Beginner's guide

So you're getting into pour-over coffee

Pour-over has a reputation for being precious — small ceramic cones, careful pours, grams instead of scoops. Most of that reputation is unearned. Here's what you actually need, where the one real expense is (the grinder), and the long list of things you'll be told to buy that you genuinely don't need.

By The JustBeginning Editors · Published May 8, 2026
Also from us Your first week of pour-over coffee → Pour-over has a reputation for precision that makes it sound difficult. It's not. The technique is the same three moves repeated: pour slowly, pause, pour again. Here's what actually happens between your first cup and the one that finally tastes exactly right.

The 60-second version

If you only buy 3 things to start:

  1. Hario V60 Ceramic Coffee Dripper, Size 02 — The Hario V60 ceramic is the canonical pour-over dripper — more tutorials and recipes written for it than anything else.
  2. Baratza Encore ESP Coffee Grinder — The Baratza Encore ESP is where most of your budget should go. A blade grinder will ruin your coffee; this won't.
  3. Bonavita 1L Digital Variable Temperature Gooseneck Kettle — A gooseneck kettle with temp control. Regular kettles pour too fast and wide — you can't do pour-over without one.
Budget total
$133
Typical total
$333
The wide range is almost entirely the grinder. A hand grinder keeps you under $150; a Baratza pushes the kit to $330. Both make good coffee.
Before you buy anything

A few things worth knowing first

The grinder is the most important purchase in this entire setup. A $10 plastic V60 with a good burr grinder makes better coffee than a $200 Chemex with a blade grinder. Blade grinders chop beans unevenly — uneven grounds extract unevenly, and uneven extraction tastes bitter and muddy. If you're going to spend money anywhere, spend it on the grinder.

You need a gooseneck kettle. Not because pour-over is fussy, but because a regular kettle pours too fast and too chaotically to control. The technique is about where the water lands and how slowly you pour. A gooseneck is what makes that possible. This is non-negotiable if you want your coffee to taste like pour-over and not like drip.

Buy whole beans and grind immediately before brewing. Pre-ground coffee loses most of its aromatic complexity within 30 minutes of grinding. Pour-over is a gentle extraction method that depends on fresh, consistently ground coffee — it has less margin for error than a drip machine, which compensates with pressure and volume.

The gear

What you actually need

dripping liquid in cup

Photo by Goran Ivos on Unsplash

Dripper

The dripper holds the filter and coffee and sits over your cup or server. The three names you'll keep seeing are the Hario V60 (cone, single hole, requires controlled pour), the Kalita Wave (flat-bottom, three small holes, more forgiving), and the Chemex (hourglass glass carafe, thicker filters, cleaner cup). For beginners, start with the V60 — not because it's the easiest, but because the entire pour-over community teaches with it. Every tutorial, every recipe, every troubleshooting thread is written for the V60. Learn on what there's the most help for.

Dripper — what's the difference?

A few common shapes, each making a different trade.

Hario V60

Conical dripper, single large hole. The community standard.

Shape
Cone
Hole
Single spiral opening
Filter type
V60 cone papers
Skill curve
Medium — pour speed and placement matter

Best for First-time pour-over brewers who want to tap into the largest community of tutorials and recipes

Tradeoff Less forgiving than the Kalita — inconsistent pouring shows up in the cup

↓ See our pick
Kalita Wave 185

Flat-bottom dripper, three small holes. More forgiving by design.

Shape
Flat-bottom
Holes
3 small holes
Filter type
Kalita Wave papers (proprietary)
Skill curve
Lower — flatter bed produces more even extraction naturally

Best for Anyone who gets frustrated by inconsistent V60 results and wants more even extraction by design

Tradeoff Requires its own proprietary Kalita Wave filters; fewer tutorials and recipes than the V60

↓ See our pick
Chemex

All-in-one glass carafe. Thicker filters, cleaner cup, slower brew.

Shape
Hourglass carafe
Filter type
Chemex bonded papers (proprietary)
Capacity
3, 6, 8, or 10 cups
Skill curve
Low — thick filters slow the brew naturally

Best for Making coffee for 2-4 people at once; wants a clean sediment-free cup; cares how the brewer looks on the counter

Tradeoff Expensive proprietary filters; different recipes than V60; doesn't transfer technique directly

↓ See our pick
Hario V60 Ceramic Coffee Dripper, Size 02 Best starter
Hario

Hario V60 Ceramic Coffee Dripper, Size 02

$

The canonical pour-over dripper. More recipes, videos, and troubleshooting threads are written for this exact piece than for any other. The ceramic version holds heat better than plastic — useful when you're pouring room-temperature-to-boiling water through it repeatedly. About $25. It will last decades.

Watch out for: Size 02 brews 1-4 cups. Don't get the 01 unless you only ever make one small cup.

See on Amazon →
Hario V60 Plastic Coffee Dripper, Size 02 Budget pick
Hario

Hario V60 Plastic Coffee Dripper, Size 02

$

Brews identically to the ceramic. The V60's performance comes from the spiral ridges, cone geometry, and filter paper — not from what the cone itself is made of. If you want to spend $10 to try pour-over before committing to the full kit, start here.

Watch out for: Plastic loses heat faster than ceramic. Rinsing the dripper with hot water before you brew matters more here than with the ceramic version.

See on Amazon →
Chemex 6-Cup Classic Coffee Maker Upgrade pick
Chemex

Chemex 6-Cup Classic Coffee Maker

$$

A completely different experience than the V60. Chemex's thick proprietary filters remove most of the oils that give V60 its texture, producing a clean, bright, almost tea-like cup. The glass hourglass carafe looks like a design museum piece. The right choice if you're making coffee for two or three people at once and want something that looks good doing it.

Watch out for: Uses its own proprietary Chemex filters, not V60 filters. Different recipes and different grind settings — don't expect V60 technique to transfer directly.

See on Amazon →
black coffee maker beside white and blue ceramic mug

Photo by Battlecreek Coffee Roasters on Unsplash

Grinder

This is where the money goes, and where people make the biggest mistake. A blade grinder — the spinning-blade type that looks like a tiny food processor — chops beans unevenly, producing a mix of fine powder and large chunks. Pour hot water through that and you get over-extracted bitter coffee from the fines and under-extracted sour coffee from the chunks, simultaneously. A burr grinder crushes beans between two abrasive surfaces set to a precise gap, producing consistently sized grounds. Consistent grounds extract evenly. Buy a burr grinder; skip anything with a spinning blade.

Baratza Encore ESP Coffee Grinder Best starter
Baratza

Baratza Encore ESP Coffee Grinder

$$$

The entry-level electric burr grinder the pour-over community has recommended for over a decade, now updated with more grind settings. Push a button, wait 20 seconds, have consistent grounds. Baratza's customer service and repair support are exceptional — they sell replacement parts and will help you fix the grinder rather than replace it. Around $180.

Watch out for: Use grind settings 15-25 for V60 pour-over. The dial goes higher for coarser methods like French press. The included guide tells you where to start.

See on Amazon →
Timemore Chestnut C3 Manual Coffee Grinder Budget pick
Timemore

Timemore Chestnut C3 Manual Coffee Grinder

$$

A hand grinder with burr quality that shouldn't exist at this price. Grind consistency approaches electric grinders costing three times more. The downside is physical: 25g of beans takes about 90 seconds of cranking. Quiet, portable, no electricity, under $60. The right buy if you're not ready to spend $180 on a Baratza but refuse to use a blade grinder.

Watch out for: Set around 20-24 clicks from zero for V60 pour-over. Slower than electric — not a problem for one or two cups, mildly tedious if you're filling a Chemex.

See on Amazon →
A stainless steel gooseneck kettle on a wooden board

Photo by Lera Ginzburg on Unsplash

Kettle

A gooseneck kettle is required. A regular kettle pours too fast and too wide — you can't control where the water lands or slow it to a steady stream over the grounds. Pour-over technique is built around precise, controlled pouring: starting at the center, spiraling outward, pausing, resuming. The gooseneck's narrow curved spout is what makes that possible. Temperature control is a strong secondary feature — 200-205°F for light and medium roasts, 190-195°F for dark — but an instant-read thermometer covers you if budget is tight.

Bonavita 1L Digital Variable Temperature Gooseneck Kettle Best starter
Bonavita

Bonavita 1L Digital Variable Temperature Gooseneck Kettle

$$

Six preset temperatures, 1-degree precision, 1200 watts heats to temp in about 3 minutes. The gooseneck is genuinely narrow and pour-controllable. Solid, unsexy, and around $60. Most people brewing pour-over at home don't need anything more than this.

Watch out for: The hold function can run a few degrees warm — check once with an instant-read thermometer. The kettle lifts off a corded base; don't try to pour with the base still attached.

See on Amazon →
Fellow Stagg EKG Electric Gooseneck Kettle Upgrade pick
Fellow

Fellow Stagg EKG Electric Gooseneck Kettle

$$$

The object you leave on the counter because you want to look at it. Temperature accurate to ±1°F, holds for 60 minutes, has a built-in countdown timer. The spout pours beautifully. Worth it once pour-over becomes a daily ritual and you want gear that reflects that. Around $165.

Watch out for: The original EKG does not have the 60-minute hold — that's the Pro model. If the hold feature matters to you, confirm which model you're buying before checkout.

See on Amazon →

Scale

You brew pour-over by weight, not by scoops. The standard ratio is 60g of coffee per 1 liter of water — about 1g per 15-16g of water for a single cup. Scoops introduce too much variability: grounds pack differently depending on roast level, grind size, and humidity. A scale also lets you track your pour speed in real time, which is how you build consistency. If you already own a kitchen scale, use it and just time on your phone. A built-in timer is the upgrade that makes it genuinely convenient.

OXO Brew 6 lb Precision Coffee Scale with Timer Best starter
OXO

OXO Brew 6 lb Precision Coffee Scale with Timer

$$

Built specifically for pour-over — 0.1g resolution, 6-lb capacity, and a built-in timer button you can hit without picking up your phone with wet hands. Display is large and easy to read in a kitchen. Around $55. If you already own any kitchen scale, use that for now and skip this.

Watch out for: The auto-off function is aggressive and can interrupt a long brew. Get in the habit of tapping the scale to wake it at the start of your bloom.

See on Amazon →
Etekcity Digital Kitchen Scale Budget pick
Etekcity

Etekcity Digital Kitchen Scale

$

If you already have a kitchen scale, use it. If you need to buy one and don't want to spend $55 on a coffee-specific scale, this is $20 and works fine. Use your phone timer alongside it — the OXO's built-in timer is a convenience, not a necessity.

Watch out for: 0.1g resolution matters for weighing coffee precisely. Make sure whatever scale you buy reads in grams to one decimal place, not just whole grams.

See on Amazon →

Filters

Paper filters are consumables, not gear — but the right ones matter. If you're brewing with a V60, use Hario's own filters. Generic cone filters are usually cut for a steeper angle and don't seat correctly in the V60's spiral ribs, which slows the drain unpredictably. The natural (unbleached, brown) filters don't require pre-rinsing for flavor. The white (oxygen-bleached) ones are fine too — just rinse them first with hot water to knock out any papery taste before you add your coffee.

Hario V60 Paper Coffee Filters, Size 02, Natural, 100ct Best starter
Hario

Hario V60 Paper Coffee Filters, Size 02, Natural, 100ct

$

The tabbed natural filters seat perfectly in the V60 02 and don't add papery taste without pre-rinsing. A 100-count box lasts two to three months for a daily brewer. Cheap enough to always have a spare box.

Watch out for: Size 02 for the V60 02 dripper. Size 01 filters fit the smaller V60 01 but not the 02.

See on Amazon →
Hario V60 Paper Coffee Filters, Size 02, White, 100ct Specialty pick
Hario

Hario V60 Paper Coffee Filters, Size 02, White, 100ct

$

The white (oxygen-bleached) version produces a marginally cleaner cup than the natural filters. The trade-off: always rinse them with hot water before brewing or the papery taste comes through. Same price as the natural filters. Get these if you find the natural filters impart any off-flavor.

Watch out for: Rinse with hot water before adding coffee — this step is optional with natural filters but not with white ones.

See on Amazon →
Save your money

What you don't need yet

Beginners get pressured to buy a lot of stuff that doesn't help them play better. Here's what we'd skip on day one.

  • Specialty water or a water filter — Filtered tap water is fine for your first 50 brews. If your tap water tastes fine to drink, it'll make fine pour-over. Mineral content optimization is a variable for much later — after you've dialed in grind and ratio.
  • A coffee refractometer — Used to measure extraction yield by percentage. A legitimate tool for serious home brewers. Also costs $100+ and requires understanding your baseline before the number means anything.
  • An airtight canister with a CO2 valve — Useful once you're buying beans in bulk. For the first few months, buy less coffee more often — a 250g bag used in two weeks doesn't need special storage.
  • A coffee subscription — Great eventually. Not yet. Spend your first few weeks buying single bags from a local roaster so you can taste the same beans repeatedly and learn what a well-extracted cup from that specific coffee should taste like. Constant variety is a distraction when you're still learning to dial in.
  • A separate server or carafe — You can brew directly into your mug. A server is useful for Chemex or large V60 batches, but unnecessary for a single cup.
  • Multiple drippers — Own one dripper, learn it completely, then consider another. Switching between a V60 and a Kalita Wave before you understand either one just resets your calibration.
First week

Your first seven days

A short, real plan to get from gear-on-doorstep to actually playing.

  1. Rinse your paper filter before every brew — pour hot water through it, let it drain into the sink, discard. This removes papery taste and pre-heats the dripper so it doesn't steal temperature from your brew. · Action
  2. Start with 16g of coffee and 240g of water. That's a 1:15 ratio — the standard starting point. Weigh both. Don't scoop. · Action
  3. Follow James Hoffmann's V60 technique for your first ten brews. Don't improvise. His 20-million-view YouTube tutorial is the de facto beginner reference — the bloom timing, the pour pattern, the target brew time. · Learn
  4. Taste your first cup deliberately. Sour or sharp? Grind finer. Bitter or harsh? Grind coarser. Weak or watery? Add more coffee, not less water. Change one variable between brews. · Action
  5. Brew the same recipe every day for five days before changing anything. By day five you'll have muscle memory for the bloom timing and pour speed, and a reliable baseline to compare against. · Action
FAQ

Common questions

How much does it cost to start brewing pour-over coffee?

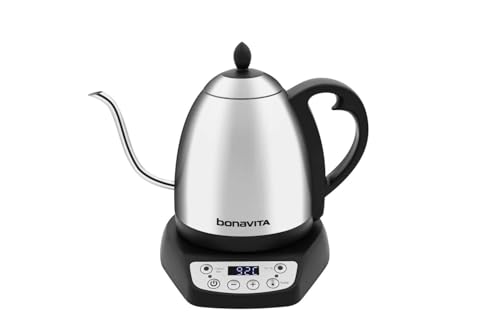
The minimum effective setup is around $133: a Timemore C3 hand grinder ($55), a Bonavita gooseneck kettle ($60), a V60 plastic dripper ($10), and filters ($8). If you already have a kitchen scale, you're done. Add a Baratza Encore ESP and an OXO scale and you're at around $330 — that's the typical kit for someone committed to pour-over as a daily practice.

Do I really need a burr grinder? My blade grinder seems fine.

Yes. Here's the honest version: blade grinders feel fine when you're using a drip machine, which compensates for uneven grounds with heat, pressure, and volume. Pour-over strips those compensations away. A blade-ground cup through a V60 tastes noticeably muddy and bitter once you've had a burr-ground cup from the same beans.

What coffee should I buy for pour-over?

A medium roast, whole bean, roasted within the past 3-4 weeks. Light roasts are more complex but less forgiving — their brightness reads as sourness if your extraction is slightly off. Dark roasts tend toward bitterness at the temperatures pour-over uses. Medium is the best place to calibrate. Any local roaster works; Counter Culture, Intelligentsia, Onyx, and Blue Bottle are solid online options.

What water temperature should I use?

200-205°F for most medium roasts — just off a full boil. Light roasts can handle full boiling water (212°F); dark roasts extract more cleanly at 190-195°F. Without a temperature-controlled kettle, bring water to a full boil and let it sit for 60 seconds — that's close enough to 200°F to start.

How long should a pour-over take?

Total brew time from first pour to last drop should be 3-4 minutes for a V60 at standard grind. Under 2:30 means your grind is too coarse — water is running through too fast. Over 4:30 means your grind is too fine — water is choking and over-extracting. Brew time is your most reliable diagnostic tool.

What is a bloom and do I need to do it?

The bloom is a small initial pour of hot water — about twice the weight of your coffee — followed by a 30-45 second pause. CO2 trapped in fresh coffee degasses during that pause; if you skip it and just pour everything at once, the CO2 creates uneven channels through the grounds and extraction suffers. Yes, you need to do it. It takes 45 seconds. Fresh beans bloom dramatically with visible bubbling; older beans barely move at all.

Going further

Where to next

Related hobbies

Browse by category

Authoritative sources

  • James Hoffmann (YouTube) — The clearest, most scientifically grounded coffee channel on the internet. His V60 technique video is the de facto beginner reference. His grinder comparison videos will save you money.
  • r/Coffee — Active, knowledgeable community. The wiki is good. Search before posting — most beginner questions have detailed answers already.
  • Barista Hustle — Professional-level coffee education, free. Articles on extraction theory, brewing ratios, and sensory training. More technical than you need immediately, invaluable once you're past the basics.
  • Counter Culture Coffee — Learn — One of the best specialty roasters in the US also publishes detailed brewing guides. The V60 and Chemex recipes are clean and well-tested — a good second opinion after Hoffmann.
  • Sweet Maria's — Primarily a green bean retailer for home roasters, but their library section has thorough equipment and brewing guides. Opinionated and useful.