LED neon flex strips have made custom sign-making genuinely accessible. For $150-280 in materials you can build a glowing sign at home without a torch or glass studio. Here's what to buy first, what order the build goes in, and the three decisions that trip most beginners up.
By Colin B. · Published June 7, 2026 · Last reviewed June 7, 2026
A 12x18-inch sign with acrylic backing, flex strip, and power supply runs $150-200. A larger 24x36-inch sign needing 8-10m of flex runs $250-350. The tools are reusable forever.
We earn commission on qualifying Amazon purchases — see our
affiliate disclosure.
Price tiers and budget totals shown above are editorial estimates;
actual Amazon prices vary.
At a glance
Our top pick in each category
The fastest path through this guide — each best-starter pick by category.
Scroll for the budget and upgrade alternatives.
Decide on your sign size before ordering anything. A 12x18-inch sign uses about 3 meters of flex. A 24x36-inch sign needs 8-10 meters. Size determines how much flex, what power supply wattage, and how large an acrylic sheet you need. Sketch it first, measure the letter path length, then order.
LED neon is not glass neon. The material is flexible silicone-coated LED strip, not gas-filled glass tubing. You don't need a torch, ventilation, or specialized training. The aesthetic is very similar; the process is entirely different. Don't let the word 'neon' put you off.
12V is right for your first sign. 24V systems handle long runs better (10-plus meters), but almost any first sign fits within a 5-meter 12V setup. Power supplies, connectors, and accessories are all simpler and more widely available at 12V. Upgrade when you actually outgrow it.
The flex strip is the core material: a flexible tube of LED chips inside a silicone casing that bends around curves and cuts to length with scissors. Buy for the voltage you'll use (12V for most home signs), the color you want, and a profile width that matches your sign scale. Most beginner signs use 1cm or 1.5cm wide flex.
LED Neon Flex Strip — what's the difference?
A few common shapes, each making a different trade.
12V Single-Color
Safe, simple, and right for most home signs up to 5 meters.
Voltage
12V DC
Max run
5m per circuit
Power supply
Widely available
Best for First signs, indoor builds, home studio use
Tradeoff Brightness drops slightly at the far end of a 5m run
Remote-controlled color; wiring is more complex than single-color.
Voltage
12V or 24V DC
Controller
Included IR or app-controlled
Colors
16+ million
Best for Party signs, social media content, accent lighting
Tradeoff Requires a separate controller; can't mix with single-color sections
Best starter
ALITOVE
12V LED Neon Sign Rope Light 16.4ft
$$
★★★★★Our rating
ALITOVE is a well-known LED brand with strong QC, and this rope light is explicitly made for DIY sign making. Silicone construction bends smoothly, cuts cleanly at the marked intervals, and the 5m length covers a 12-18 inch sign with room to spare. Available in warm white, red, blue, and other sign-ready colors.
What we like
Cuts cleanly at marked intervals without fraying the silicone
Flexible enough for tight lettering without cracking or kinking
Color stays consistent across multiple reels from the same batch
What to know
Color can shift slightly between different production batches
Connectors sold separately; plan to solder or buy matching pigtails
Explicitly marketed for signboard and logo making. High LED density (120 LEDs/m) produces a smooth, even glow and the warm white color is the most versatile for first signs. A solid learn-on option if you want to practice the build workflow before committing to premium flex.
What we like
Kit includes mounting clips, simplifying the very first build
Color is good enough for practice signs and learning the process
What to know
Included power adapter too weak for a full 5m run; replace it
Color accuracy inconsistent; not ideal for client work or gift pieces
The FCOB construction means 480 LEDs per meter with no individual hotspots — the light output is completely smooth and uniform, much closer to real glass neon than standard rope light. IP67 waterproofing also makes it the pick for window or outdoor-facing signs. Requires 24V; plan your power supply before ordering.
What we like
Even brightness end-to-end on runs over 5 meters
Less heat generation than 12V at equivalent brightness levels
What to know
24V power supplies and connectors are harder to find locally
Overkill for a first sign under 18 inches; adds unnecessary complexity
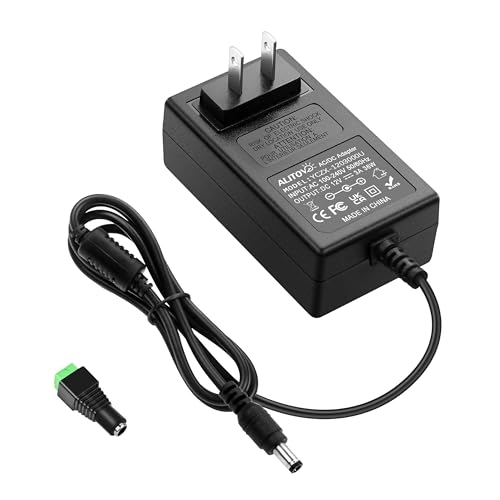
Every LED neon sign needs a regulated DC power supply. Size it to at least 120% of your total flex wattage (a 5m strip of 12V flex typically draws 20-40W depending on density). MEAN WELL is the brand professional sign shops use. A cheap unbranded supply can fail mid-display or, worse, overheat.
Best starter
MEAN WELL
LRS-50-12 Power Supply
$17.32 as of Jun 22, 2026
★★★★★Our rating· Only 20 left in stock - order soon.
The 12V 4.2A (50W) MEAN WELL is what commercial sign shops reach for in hobbyist builds. Enclosed and ventilated, runs cool, and has a screw terminal block for clean wiring. At $20-25 it's a buy-once supply that handles any home sign under 50W, which covers most single-color 5m builds.
What we like
Industry standard; what commercial sign shops actually use
A plug-in wall adapter works fine for small signs under 25W (roughly 3m of standard flex). No wiring required; just connect the barrel jack to a matching connector on your flex. The right call if you're making a single small sign and want to skip the terminal block entirely.
What we like
No wiring required; barrel jack connects directly to most flex kits
Compact and tidy for a single small display panel
What to know
Undersized for anything over 25W; real overheating risk above that
Barrel connector standard varies; confirm compatibility before buying
When you're running multiple sections or building something larger than 24 inches wide, the 100W (8.5A at 12V) LRS-100 gives you the headroom. Same quality as the LRS-50, just bigger. Plan for it if you're making a 10-letter sign or anything with multiple independently wired sections.
What we like
100W headroom handles multi-section and large-sign builds easily
Same MEAN WELL reliability; typically runs at 50% load or less
What to know
Significantly more expensive than the LRS-50 for most first builds
Physically larger; plan housing or backboard cutout accordingly
The backing board holds the flex in its designed shape and mounts to the wall. Clear acrylic is the classic choice (the floating-letter look comes from seeing through the backing). Black PVC foam board is lighter and easier to cut, which makes it the better first-project material. Both are available online and at local sign shops.
Best starter
CALPALMY
12x24 Inch Clear Acrylic Sheet 1/8" (2-Pack)
$$
★★★★★Our rating
Clear cast acrylic is the standard backing for home neon signs. This 2-pack gives you one panel for the actual sign and one for practice cuts. At 1/8" thick it's light enough to hang with Command strips yet rigid enough for signs up to 18 inches wide. Score-and-snap cuts work for straight edges.
What we like
Transparent backing gives the classic floating-letter neon look
Score-and-snap cuts work for straight edges; no power tools needed
What to know
Cracks if drilled with a wood bit at high speed; use the right bit
Heavier than PVC foam board for the same panel surface area
★★★★☆Our rating· Only 2 left in stock - order soon.
Black PVC foam board cuts with a utility knife, weighs almost nothing, and hides the backing cleanly on dark-colored signs. Great for first projects where you want to focus on the flex-bending workflow rather than acrylic handling and drilling.
What we like
Cuts with a utility knife; no power tools or drill bits needed
Lightweight; easy to hang with standard picture-hanging hardware
What to know
Bows over 24 inches wide without a frame or cleat behind it
Non-transparent; you lose the floating-letter look on light walls
Frosted acrylic diffuses the LED light before it reaches the viewer, softening harsh hotspots from the individual LED chips. The effect reads closer to real glass neon and less like a flex strip. Worth it for display pieces or gifts where the quality of the glow matters to you.
What we like
Diffuses LED hotspots into the smooth glow of real glass neon
Significantly higher perceived quality for display or gift pieces
What to know
Shows fingerprints; requires careful handling during assembly
More expensive per panel than clear acrylic of the same size
LED neon flex is flexible but not infinitely so. For curves tighter than about 3 inches in radius (the inside of letters like C, S, or G) you'll need a heat gun to soften the silicone. You also need a printed template to shape the flex against, plus mounting clips to hold sections in place. These tools are cheap and reusable across every sign you'll ever make.
Best starter
SEEKONE
1800W Heat Gun Variable Temp
$28.99 as of Jun 22, 2026
★★★★★Our rating· In Stock
Variable-temperature 1800W heat gun with two speed settings. The low setting is enough to make the silicone pliable without melting it. Hold it 4-6 inches from the flex and keep moving continuously. The SEEKONE is consistent, available for under $30, and reliable enough that you won't burn a strip mid-bend.
What we like
Two temperature settings let you dial in heat for flex, not melting
1800W heats up in under 30 seconds; no waiting around between bends
What to know
No fine temperature control between the two preset settings
Gets very hot; keep it moving and pointed away from power cords
Snap-in clips hold the flex strip against the backing while you position and adjust the design before securing it permanently. At $8-12 for 100 clips, you have enough to prototype a full sign twice over. These also work as the permanent fastener for flex that doesn't need routing into a channel.
What we like
100 clips covers a full 5m sign with plenty of extras
Snap-in design holds flex firmly without glue or fasteners
What to know
Sized for a specific flex profile width; confirm before ordering
Plastic yellows under UV after years of outdoor sun exposure
If you want the finished, commercial look you see in bar signage, aluminum channel holds the flex and hides all the clip hardware. The 10-pack gives you enough channel to do a full sign with sections to spare. Cut to length with a hacksaw, mount to the backing, and drop the flex in.
What we like
Professional finish; hides clips and gives the flex crisp edges
Aluminum acts as a minor heat sink, extending LED lifespan
What to know
Requires a hacksaw and more installation time than simple clips
Adds 4-6mm to the sign's depth; plan standoff length accordingly
Your finished sign needs to float off the wall. The gap behind the backing hides the power cable run and is part of the classic neon sign aesthetic. Clear acrylic standoffs (also called barrel standoffs) are the standard solution: four screws hold the backing 1-2 inches off the wall and disappear visually. For lighter signs, heavy-duty adhesive strips work just as well.
Best starter
Sign Standoff Screws for Acrylic Mounting 0.75in (20-Pack)
$
★★★★★Our rating
Metal standoffs are the standard mounting hardware for DIY neon signs. Four standoffs at the corners hold the backing off the wall, the power cable routes behind out of sight, and the hardware gives a clean, finished look. The 0.75-inch depth keeps the sign close to the wall without a gap that looks unintentional.
What we like
Standard sign mounting hardware; four corners hold most sign sizes
Creates the floating-sign gap that hides the power cable behind
What to know
Requires pre-drilling the acrylic; wrong bit or speed cracks the panel
Needs wall anchors in drywall; the screws alone won't hold long-term
For lighter signs under 5 lbs, Command strips are the no-drill option. Clean installation and removable without wall damage. Most finished neon signs with acrylic backing run 3-5 lbs, right at the Command heavy-duty limit. Good for renters or finished spaces where drilling isn't an option.
What we like
No drilling required; removable without damaging the wall surface
Fast installation; fully set in one hour
What to know
Fails in humidity; not for bathrooms or laundry rooms
Heavy acrylic signs over 5 lbs push the weight rating uncomfortably
Most people stall out before they start because glass neon looks intimidating. LED flex strips changed everything. Here's the complete beginner build, from design sketch to sign on the wall.
LED neon sign making has a reputation problem. People hear “neon” and picture a glass tube craftsperson with a gas torch and 10 years of experience. That’s real neon. What you’re doing is different: flexible silicone LED strip, a heat gun, an acrylic backing board, and a weekend afternoon. The results are nearly indistinguishable to anyone who isn’t a neon professional.
Here’s exactly how your first sign comes together.
Before you start: the design phase
The single mistake that costs beginners the most time and money is ordering materials before finalizing the design. Measure twice, order once.
Sketch your sign on paper first. For lettering, write the words at roughly the scale you want, then trace the letter outlines with a single continuous line (following the centerline of each stroke). That continuous tracing is your flex path: measure its total length in centimeters, convert to meters, and that’s how much LED flex you need plus about 10-15% extra for waste and test sections.
A few things to decide before ordering:
Size. A 12x18-inch sign is a good first-sign size: big enough to look intentional on a wall, small enough to handle easily. A 24x36-inch sign is doable for a first build but leaves less margin for error on bends.
Color. Single-color warm white, cool white, and red are the most forgiving. Bright colors like neon pink or green look vivid but are harder to photograph consistently.
Backing color. Clear acrylic gives you the floating-letter look where the sign appears to hover off the wall. Black PVC foam board hides the backing and works better on dark or busy walls.
Bending the flex: the actual skill
Bending is where most beginners either succeed or give up. The good news: it’s much less finicky than it sounds.
Print your design at full scale. If the sign is larger than a single sheet of paper, print it in tiles and tape the sheets together. Lay the printed template on your workbench.
Cut your backing board to your sign’s outer dimensions. Transfer the flex path from the paper template to the backing using pencil or masking tape.
Now bend:
Hold the heat gun 4-6 inches from the flex strip, low temperature setting, and move it slowly and continuously along the section you’re working.
After 10-15 seconds the silicone becomes noticeably softer and pliable.
Bend it gently to your desired curve. Press it against your paper template to confirm the shape.
Hold it in place for 15-20 seconds while it cools. It will hold the shape once cool.
For tight inside curves (like the bottom of a U, or the inside of a C), make shorter passes with the heat gun rather than one long one. And never hold the heat gun stationary on the flex. Moving continuously is not just advice; it prevents melting through the silicone coating entirely.
Clip each section to your backing board with mounting clips as you go. This locks the shape while you work on adjacent sections.
Wiring: simpler than it looks
Once the flex is bent and clipped into position, you need to wire it to a power supply.
The basic circuit is very simple: positive and negative wires from your flex connect to the positive and negative terminals on your power supply. If your flex kit came with a barrel connector and your power supply has a matching socket, it’s plug-and-play. If you’re using a MEAN WELL supply with a screw terminal block, strip about 5mm of insulation from the wire ends and tighten them into the appropriate terminals.
A few wiring tips that save beginners a lot of frustration:
Calculate your wattage first. Multiply the flex’s watt-per-meter rating by your run length. Add 20% headroom. That’s your minimum power supply size.
Wire in parallel, not in series. If you have multiple sections of flex, each one should connect directly to the power supply, not chained one after another. Series wiring causes uneven brightness.
Test before you mount. Always power the sign up on the workbench and confirm every section lights before you pick up the drill.
If a section doesn’t light, check the cut points first. LED flex must be cut between the marked intervals (at the LED repeat point), not across a chip. A bad cut breaks the circuit. Recut at a proper mark and reconnect.
Mounting the finished sign
The classic neon sign mount uses clear acrylic standoffs: barrel-shaped spacers that hold the backing 1-2 inches off the wall, creating a gap for the power cable to run behind the panel.
Mark four corner mounting points on the backing board (or six points for larger signs). Drill through the acrylic slowly at those points using a proper acrylic drill bit at low speed. A regular wood bit run fast almost always cracks the panel.
Thread the power cable through the gap behind the panel or drill a small hole in the lower edge of the backing for a cleaner cable run. Mount the standoffs to the wall first, then hang the sign on them.
For smaller, lighter signs on finished drywall, heavy-duty Command strips are a legitimate alternative if you’d rather not drill. They work reliably in dry interior spaces and come off cleanly.
Uneven brightness along a long run. Almost always a voltage drop issue. You’re driving too much flex from one end. Add a second power injection point at the far end of the run, or switch to 24V flex for long runs.
A dark section in the middle. Check the cut point. If you cut across an LED chip rather than between the repeat marks, that chip and those adjacent are broken. Recut just past the break and reconnect.
The flex won’t hold a bend after cooling. The silicone wasn’t warm enough before you bent it. Give it more time under the heat gun (15-20 seconds minimum for standard flex) and hold the bend for a full 20 seconds while it cools.
Visible hotspots (individual LED chips visible instead of a smooth glow). The flex is too far from the backing, or you need frosted acrylic. A small gap between the flex and the backing diffuses the light more than having them flush against each other.
What to build next
Your first sign will teach you more than any tutorial. Most builders find themselves planning sign two before sign one is even on the wall.
The natural progression: single-color lettering with clear backing first, then a more complex multi-word layout, then a two-color sign with separate sections wired in parallel. RGB color-changing flex is fun but adds a controller and wiring complexity; save it for sign three or four, once the base build feels automatic.
Save your money
What you don't need yet
Beginners get pressured to buy a lot of stuff that doesn't help them play
better. Here's what we'd skip on day one.
Glass neon equipment — Real glass neon requires a gas torch, bombarding unit, vacuum pump, and years of training. It is a completely different craft from LED sign-making — don't conflate the two.
A laser engraver or Cricut — Print your template on paper and trace it. Cricut and laser add precision but the first-sign workflow is manageable without them.
RGB controller or color-changing flex — Single-color static signs are simpler to wire and build. Save color-changing for sign number three, once you know the basic workflow.
A commercial power panel enclosure — A $20 MEAN WELL supply handles anything you'll build in your first year. Professional panel enclosures are for installation-grade work.
A CNC router — Hand-routing channels with a Dremel or using mounting clips works fine for the first ten signs. CNC is a quality-of-life upgrade, not a prerequisite.
First week
Your first seven days
A short, real plan to get from gear-on-doorstep to actually playing.
Sketch your sign design on paper and trace the total letter path to estimate meters of flex you'll need. · Action
Order your LED neon flex, a matching power supply, and a backing sheet based on your design dimensions. · Buy
Print your design at full scale and tape the sheets together. This paper template is what you bend the flex against. · Action
Cut your backing board to size and mark the flex path with pencil or masking tape. · Action
Bend the flex to shape using your heat gun on the low setting. Work in small sections; hold each bend until the silicone cools (15-20 seconds). · Action
Wire the flex to the power supply and test before mounting anything to the wall. Confirm every section lights up. · Action
Mount the finished sign with standoffs and route the power cable cleanly behind the backing panel. · Action
FAQ
Common questions
What is LED neon flex, and how does it differ from glass neon?
LED neon flex is a flexible tube of LED chips inside a silicone housing that mimics the look of gas-filled glass tubes. Glass neon uses a torch, gas, and years of apprenticeship to shape; LED flex bends with a heat gun and cuts with scissors. The finished look is very similar; the process is completely different.
How much does it cost to make a first sign?
A 12x18-inch sign with acrylic backing, 3-4m of 12V flex, a MEAN WELL LRS-50-12, and standoffs comes to $150-200. A larger 24x36-inch sign needing 8-10m of flex runs $250-350. The tools (heat gun, drill bits, clips) are reusable indefinitely. Budget $150 for your first build; $200 if you want no stress about running short.
Do I need to solder to connect the flex to a power supply?
Not necessarily. Most 12V neon flex uses a barrel connector (the same round plug on laptop chargers). If your flex has a barrel connector and your supply has a matching socket, it's plug-and-play. MEAN WELL supplies use screw terminal blocks instead, which require stripping the wire but no soldering at all.
How do I bend flex around tight corners inside letters like C, S, or O?
Warm the silicone with a heat gun on its low setting held 4-6 inches from the flex, moving continuously. After 10-15 seconds the flex becomes pliable and holds its shape once it cools. For very tight curves (inside radius under 2 inches), make multiple short heat passes rather than one long one.
Can I cut the flex to any length?
Yes, at the marked cut points. Most LED neon flex has cut marks every 1-2 inches where the LED circuit repeats. Cut between the LEDs at the marked line to avoid breaking a circuit midway through. Cap the cut end with a matching silicone end cap to keep out dust and moisture.
How do I figure out what wattage power supply I need?
Multiply the wattage-per-meter of your flex by the number of meters you're running, then multiply by 1.2 for safety headroom. Example: 5m of 8W/m flex = 40W total, times 1.2 = 48W minimum. The MEAN WELL LRS-50-12 (50W rated) covers that exactly with a little room left over.
r/led (Reddit) — Active community for all LED projects. Strong troubleshooting culture and beginner-friendly. Search before posting; power supply sizing and wiring questions are covered thoroughly in the wiki.
r/DIYElectronics (Reddit) — Broader electronics DIY community. Post here for power supply sizing, wire gauge questions, and safety checks before buying.
Instructables — Neon Sign Projects — Community project walkthroughs with step-by-step photos. Useful for seeing how others handled corners, power routing, and backing materials on real builds.
MEAN WELL Official Site — Use the product selector to confirm the right LRS model for your wattage before buying. More reliable than guessing by forum recommendation.
LED Neon Sign Making Tutorials (YouTube) — Several tutorial channels cover the full build process end-to-end. Search here for bending technique videos and backing board mounting walkthroughs.
As an Amazon Associate, JustBeginning earns from qualifying purchases.
We may also earn commission from other affiliate programs linked on this
page. Editorial recommendations are independent; we don't choose
products based on commission rates.
Product prices and availability are accurate as of the date and time
indicated and are subject to change. Any price and availability
information shown on Amazon at the time of purchase will apply.
Our top pickALITOVE 12V LED Neon Sign Rope Light 16.4ft