Wildlife photography is mostly patience and one expensive decision: the lens. The good news is that you do not need a $10,000 setup. Here is what actually gets you sharp photos of animals, and what to skip until you know you want it.
By Colin B. · Published November 1, 2026 · Last reviewed November 1, 2026
Wildlife photography is not cheap, because telephoto lenses are not cheap. A Canon R50 with the RF 100-400 gets you started near $1,500. Our recommended picks (Sony a6700, Sigma 100-400, monopod, binoculars, camo) run about $3,000.
We earn commission on qualifying Amazon purchases — see our
affiliate disclosure.
Price tiers and budget totals shown above are editorial estimates;
actual Amazon prices vary.
At a glance
Our top pick in each category
The fastest path through this guide — each best-starter pick by category.
Scroll for the budget and upgrade alternatives.
Rent before you buy. Telephoto lenses cost $1,000 to $2,000, and renting a 100-400mm for a long weekend runs about $100. Do it before committing.
Pick the camera system first. Lenses lock to a mount (Sony E, Canon RF, Nikon Z), and switching later means selling everything. Choose the system with the telephoto lenses in your budget.
Your feet beat your gear. Learning an animal's habits and getting to the right place at dawn matters more than any lens upgrade.
For wildlife you want fast, reliable autofocus that tracks moving animals, not megapixels. Both bodies here are APS-C mirrorless, and that is a feature: the smaller sensor crops your frame, so a 400mm lens frames like a 600mm. Pick the body first. Lenses are locked to a mount (Sony E, Canon RF), and switching systems later means selling everything.
Best starter
Sony
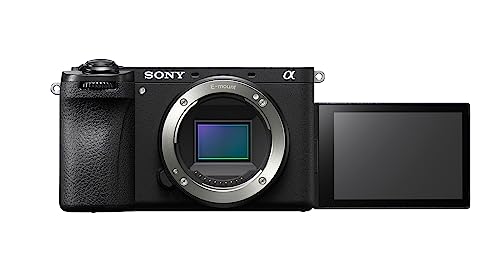
Alpha a6700
$1,398.00 as of Jun 22, 2026
★★★★★Our rating· In Stock
The a6700 has the animal-eye autofocus that makes wildlife photography feel unfair to beginners: point at a deer and the camera locks onto the eye and stays there. At about $1,500 it is the priciest body here, and the one you will not outgrow.
What we like
Subject-tracking autofocus finds animal eyes on its own
In-body stabilization helps at long focal lengths
Huge choice of Sony E telephoto lenses at every price
The cheapest way into a modern autofocus system with real animal detection. About $730 for the body leaves budget for a lens, which is where wildlife photos are actually won.
What we like
Light enough to carry all day
Animal detection autofocus handles most trail subjects
Flip-out screen helps with low-angle shots
What to know
No in-body stabilization; the lens must provide it
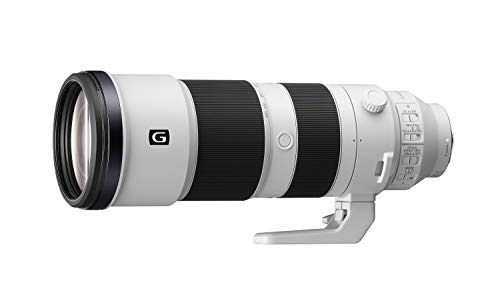
This is where the money goes, and the one decision that matters is how long. At 100-400mm you can photograph deer, foxes, and large birds from a respectful distance. At 200-600mm you can fill the frame with a songbird or a wary animal, but you carry twice the weight. A 1.4x teleconverter turns a 400mm lens into 560mm and costs you one stop of light; skip it until you know you need it. Buy for your body's mount.
Telephoto Lenses — what's the difference?
A few common shapes, each making a different trade.
100-400mm
Light enough to handhold all day. The sensible first telephoto.
Reach on APS-C
~150-600mm equivalent
Weight
1.5-2 lb
Best for Deer, foxes, large birds, hiking with a lens
Tradeoff Small animals and shy birds stay small in the frame
★★★★★Our rating· Only 1 left in stock - order soon.
This is the lens we would buy first. Sigma's 100-400 is sharp, stabilized, and light enough for a hike, and at about $1,000 it costs half what Sony charges for its own long zoom. It fits Sony E bodies like the a6700.
What we like
Sharp across the zoom range for the price
Light enough to handhold for a full morning
Built-in stabilization and a removable tripod foot
What to know
Slower to track fast flying birds than Sony's G lenses
★★★★☆Our rating· Only 1 left in stock - order soon.
The reach lens. If you shoot birds and shy animals and can stand the weight, this is where most serious wildlife shooters end up. Sharp, fast to focus, and it zooms internally.
A telephoto is a lever: every tremor in your hands is magnified at the subject. A monopod takes the weight off your arms for a fraction of a tripod's cost and still lets you move when the animal does. A gimbal head is the next step, and only worth it once your lens passes four pounds.
Best starter
Manfrotto
XPRO Carbon Fiber 4-Section Monopod
$202.36 as of Jun 22, 2026
★★★★★Our rating· In Stock
A carbon monopod is light enough that you will not leave it in the car. It extends to eye height, packs down small, and handles a 100-400 easily.
A gimbal head balances a big lens so it swings with one finger, which is the whole trick for following a bird or a running animal. Benro's GH2 does it for about $350 instead of a Wimberley's $600.
Most beginners buy a lens first and then cannot find anything to photograph. Binoculars fix that: you spot the animal, then lift the camera. They also tell you when to stop and just watch. 8x42 is the default; 10x42 reaches farther but shakes more in unsteady hands.
Best starter
Vortex
Crossfire HD 8x42 Binoculars
$$$
★★★★★Our rating
The Crossfire is the no-regrets beginner binocular: bright, sharp enough, waterproof, and backed by Vortex's lifetime warranty. About $180.
You do not need a hide on day one. Animals notice outline and movement more than color, so a drab camo layer that breaks up your shape, a face mask, and patience do most of what a hide does. Wear earth tones, move slowly, and sit still for twenty minutes. You will see more than you expect. A pop-up hide is worth it later, for nests and waterholes.
Best starter
Realtree
Performance Pullover Hoodie, Realtree Edge
$
★★★★★Our rating
About $20 for a camo hoodie that does the job of a $200 jacket for a beginner: it breaks up your outline and keeps you warm. Pick your size on the listing.
Long lenses are heavy and weather is unpredictable. A bag that carries a body, a lens, and a rain layer, a rain sleeve that costs ten dollars, and a fast card are the three purchases that stop you from losing a day.
Best starter
Lowepro
ProTactic BP 350 AW II
$$$
★★★★★Our rating
A real camera pack with a built-in rain cover and quick side access, so you can pull the camera out without putting the pack down. Check that your lens fits before packing a 200-600.
What we like
Built-in all-weather cover
Side access to the camera without removing the pack
A clear rain sleeve for about $10. Wildlife often shows up in wet weather, and animals are easiest to find in drizzle. This is the cheapest insurance in the hobby.
Wildlife photography rewards patience more than gear. Here is what your first month actually looks like, from your first blurry squirrel to your first photo you would hang on a wall.
Wildlife photography has a reputation for being expensive and hard. It is expensive, but the hard part is not the camera. It is learning to be somewhere an animal will be, quiet enough for it to stay, and ready when it does something interesting.
This is what your first month looks like, week by week.
Week 1: Start with what is nearby
Do not wait for a trip to Yellowstone. Squirrels, ducks, crows, and the deer at the edge of a local park are all wildlife, and they will teach you the same skills as a moose.
Go at dawn or the last hour before dark. Animals are active and the light is soft. Set your camera to aperture priority with the lens wide open, auto ISO, and a minimum shutter speed of 1/1000s. If the photos are blurry, the shutter was too slow. That is the cause of nine blurry wildlife photos out of ten.
Beginners walk toward the animal. Animals leave. Instead, find a spot near where animals feed, drink, or travel, and sit down. Wear a drab layer, keep your movements slow, and wait twenty minutes. The animals that left when you arrived will come back.
Use binoculars to scan before you move. Spotting an animal 200 yards away, then waiting for it to come to you, gets better pictures than chasing it.
Turn on your camera’s animal eye autofocus and tracking. Put the focus point on the eye and hold it. A sharp eye makes an average photo look good.
Week 3: Get the settings automatic
By now you should stop thinking about settings:
Shutter speed at 1/1000s or faster for anything moving, and 1/2000s or faster for birds in flight.
Aperture wide open (the lowest f-number your lens allows) to blur the background.
Auto ISO with a ceiling of 6400 or so. A grainy sharp photo beats a clean blurry one.
Burst mode on. Animals blink and move, and you want a dozen frames to choose from.
Shoot at the animal’s eye level when you can. Crouch or lie down. A photo taken looking down at an animal looks like a record. A photo taken at its level looks like a portrait.
Week 4: Look at the light and the background
Sharp is only the start. Now look at what is behind the animal. A clean, blurry background makes a subject pop. A branch growing out of its head ruins the shot. Move a step to the left and the problem often goes away.
Look at the light too. Side light at sunrise gives animals depth. Light behind them makes a rim around the fur or feathers. Harsh midday light flattens everything, so use that time to scout.
The mistakes everyone makes
Chasing the animal. You will lose. Wait and let it come to you.
Getting too close. If the animal changes its behavior, you are too close. National parks ask for 25 yards from most animals and 100 yards from bears and wolves. A longer lens is the safe answer.
Shooting at 1/250s. It works for people. It does not work for a twitching deer ear.
Buying a lens too soon. Rent a few first. It tells you which focal length you really use.
Skipping the bag. A rain sleeve and a bag cost less than one missed day.
By the end of your first month you will own a handful of keepers, you will have learned to read the light, and you will have developed a healthy patience for squirrels.
Save your money
What you don't need yet
Beginners get pressured to buy a lot of stuff that doesn't help them play
better. Here's what we'd skip on day one.
A 600mm f/4 prime — A $12,000 lens that the pros use. A $1,000 zoom gets you 90 percent of the keepers while you learn.
A teleconverter — It costs you a stop of light and some sharpness. Get longer glass only after you know your 400mm is not enough.
A pop-up hide — Camo clothes and patience do most of the job. A hide helps at nests and waterholes, once you know where animals go.
A full-frame body — APS-C crops your lens and keeps everything lighter and cheaper. Full-frame is a later upgrade.
First week
Your first seven days
A short, real plan to get from gear-on-doorstep to actually playing.
Rent a 100-400mm lens for a weekend before you buy one. · Action
Order a binocular so you can find animals before you spend on glass. · Buy
Go out at dawn to a park or wildlife refuge, sit still for 30 minutes, and photograph whatever shows up. Squirrels count. · Action
Learn the wildlife distance rules for where you shoot: the National Park Service asks you to stay 25 yards from most animals and 100 yards from bears and wolves. · Learn
How much does it cost to start wildlife photography?
About $1,500 with a Canon R50 and RF 100-400mm, or about $3,000 with our recommended picks. Rent first if you can. A weekend rental costs about $100 and tells you whether you want to keep going.
Is a 100-400mm lens long enough?
For deer, foxes, large birds, and most mammals, yes, especially on an APS-C body where it frames like a 600mm. For small songbirds and shy animals you will want 600mm or more, but that comes later.
Do I need a full-frame camera?
No. APS-C bodies crop your lens, so reach is cheaper and lenses are lighter. Many working wildlife photographers use them.
What is the difference between wildlife and bird photography?
The gear overlaps, but wildlife adds mammals, predators, and marine animals, which means different distances, different safety rules, and more emphasis on patience and fieldcraft. See our bird photography guide for a bird-focused kit.
How close is too close to a wild animal?
Closer than they are comfortable with. If the animal changes its behavior, you are too close. National parks require 25 yards from most animals and 100 yards from bears and wolves. A longer lens is the legal and safe answer.
As an Amazon Associate, JustBeginning earns from qualifying purchases.
We may also earn commission from other affiliate programs linked on this
page. Editorial recommendations are independent; we don't choose
products based on commission rates.
Product prices and availability are accurate as of the date and time
indicated and are subject to change. Any price and availability
information shown on Amazon at the time of purchase will apply.
Our top pick100-400mm f/5-6.3 DG DN OS Contemporary (Sony E)


 Best starter