Candy is sugar cooked to an exact temperature, so the most important tool is a thermometer you've checked in boiling water. Add a heavy saucepan, a silicone mat and a few molds, and you can make caramels, toffee, fudge, hard candy and marshmallows. Here's what to buy and which candies to make first.
By Colin B. · Published November 16, 2026 · Last reviewed November 16, 2026
A TempPro digital candy thermometer, a Tramontina 3-quart tri-ply saucepan, a silicone mat and caramel wrappers come to about $85. Add caramel and lollipop molds, LorAnn flavoring oils and gelatin for marshmallows and you're near $140.
We earn commission when you buy through links on this page, including
Amazon. See our affiliate disclosure.
Price tiers and budget totals shown above are editorial estimates;
actual prices vary.
At a glance
Our top pick in each category
The fastest path through this guide — each best-starter pick by category.
Scroll for the budget and upgrade alternatives.
Get a thermometer you trust, then test it. Clip-on dial thermometers are cheap and stay in the pot, but many read a few degrees off. A digital probe thermometer with an alarm is easier to read and more accurate. Either way, check it in boiling water (212F at sea level) and adjust your recipes by the difference.
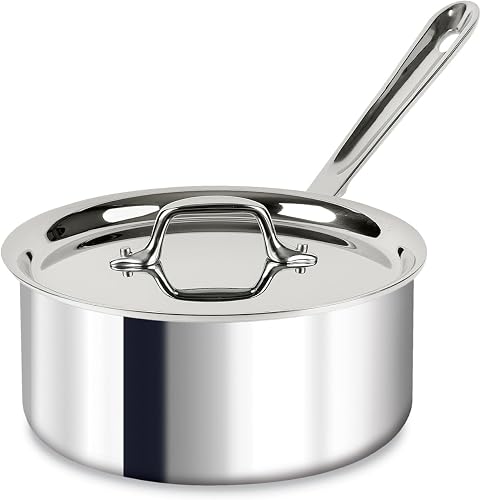
Use a heavy saucepan. Thin pans scorch sugar and cream before the center gets hot. A 3-quart tri-ply stainless saucepan is the right size for most batches: deep enough that boiling sugar doesn't climb over the top, and light-colored inside so you can see caramel change color.
Start with forgiving candies. Soft caramels and toffee are easier than fudge, which can turn grainy, and hard candy, which hates humidity. Make candy on dry days, measure everything before you start, and never leave boiling sugar alone.
The gear
What you actually need
Candy thermometers
A thermometer is the one tool you can't skip. Candy depends on hitting a temperature within a few degrees: caramels at about 245F, toffee and hard candy at 300F. Digital thermometers read faster and more precisely, and alarm models beep at your target. Clip-on dial thermometers are cheap and stay in the pot, but read them at eye level. Test any thermometer in boiling water before your first batch.
Best starter
TempPro
TempDip Digital Candy Thermometer with Pot Clip
$22.99 as of Nov 16, 2026
★★★★★Our rating· In Stock
A digital candy thermometer with a 10-inch probe and a pot clip, so it stays in the syrup while you stir. It reads quickly and clearly, which matters in the last few degrees when sugar moves fast. About $23. 5,100+ reviews at 4.6 stars.
Candy and Deep Fry Thermometer with Pan Clip, 12-Inch
$8.99 as of Nov 16, 2026
★★★★☆Our rating· In Stock
The classic stainless dial thermometer with sugar stages printed on the face and an adjustable pan clip. It's cheap and needs no batteries, but check it in boiling water first. About $9. 13,000+ reviews at 4.6 stars.
A probe thermometer with an alarm that beeps the moment sugar hits your target, from a brand known for accuracy. The probe sits in the pot while the base sits safely on the counter. About $57. 320+ reviews at 4.5 stars.
Sugar and cream scorch in thin pans. A heavy, tri-ply stainless saucepan spreads heat evenly so the bottom doesn't burn before the rest reaches temperature. A 3-quart size suits most recipes and leaves room for caramel and marshmallow syrup to bubble up. A light-colored interior helps you see caramel change color. Avoid nonstick for candy: very hot sugar wears out the coating.
A tri-ply stainless saucepan with an aluminum core that heats evenly up the sides, at a fraction of the price of premium brands. It's a favorite budget pick for cooks and handles caramel, toffee and syrup beautifully. About $37. 520+ reviews at 4.7 stars.
The tri-ply saucepan many pastry cooks use for life, made in the USA. It heats a little more evenly and is built to last decades, but makes the same candy as the Tramontina. About $150. 2,300+ reviews at 4.7 stars.
A silicone baking mat on a sheet pan is where toffee, brittle and hard candy get poured: hot sugar releases from it cleanly, with no greasing. Caramels and fudge are poured into a parchment-lined pan and cut, so you don't need molds for those. Silicone cavity molds are for small chocolates, gummies and cut-free caramels. Lollipop molds come with sticks and need a heat-safe silicone rated for hard candy temperatures.
Best starter
Amazon Basics
Silicone Baking Mat, Half Sheet
$14.36 as of Nov 19, 2026
★★★★★Our rating· In Stock
A nonstick silicone mat that fits a half-sheet pan. Pour toffee, brittle and hard candy straight onto it, and it peels away cleanly once set. It's one of the most-reviewed kitchen items on Amazon. About $14. 124,000+ reviews at 4.7 stars.
Small square silicone molds for caramels, chocolates and gummies, so every piece comes out the same size without cutting. Fill them with a spouted measuring cup. About $9. 11,000+ reviews at 4.6 stars.
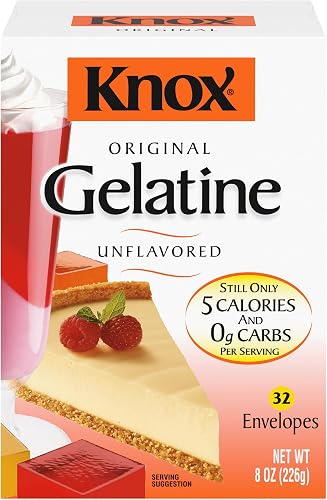
A few supplies make homemade candy look and taste like a shop's. Wax paper wrappers keep caramels from sticking together and stop hard candy from going tacky. Super-strength flavoring oils are made to survive 300F hard candy, where ordinary extracts cook off. Unflavored gelatin is all marshmallows need besides sugar and corn syrup. Buy corn syrup, butter and cream fresh at the grocery store.
Best starter
DIYASY
Candy Wrappers for Caramels, 600 Pack
$9.98 as of Nov 16, 2026
★★★★★Our rating· In Stock
Precut wax paper squares for twist-wrapping caramels and taffy. A big pack covers many batches, and wrapped candy stays soft and doesn't stick together. About $10.
Concentrated candy flavorings made for hard candy and lollipops, where alcohol-based extracts burn off. A few drops flavor a whole batch. About $18. 1,800+ reviews at 4.6 stars.
Plain gelatin in premeasured packets, the base of homemade marshmallows and gummies. One batch of marshmallows uses about three packets. About $16. 9,000+ reviews at 4.5 stars.
Candy making is mostly temperature. Learn to calibrate a thermometer and read the sugar stages, and caramels, toffee, fudge, hard candy and marshmallows all follow. Here's a four-week plan with one new candy each week.
Every candy is sugar cooked to a specific temperature. A few degrees decide whether you get soft caramel or a jaw-breaking slab, so the most important thing you’ll do this month is learn to trust your thermometer.
Before you start: Calibrate and learn the stages
Put your thermometer in a pot of boiling water. At sea level it should read 212F. If it reads 210F, add 2 degrees to every recipe target. You also lose about 1 degree for every 500 feet of altitude, which the boiling-water test handles automatically.
The stages to know: soft ball (235 to 240F) for fudge, firm ball (245 to 250F) for caramels, hard crack (300 to 310F) for toffee and hard candy. Have everything measured and the pan lined before you turn on the heat. Sugar moves fast at the end.
Caramels are forgiving and teach you to watch the thermometer. Cook sugar, corn syrup, butter and cream in a heavy pot, stirring gently, until it reaches about 245F. Pour into a parchment-lined pan, let it set overnight, then cut and wrap in wax paper. Cook a few degrees higher next time for firmer caramels, or lower for softer.
English toffee goes to hard crack, about 300F. Stir constantly, pour it onto a lined sheet, scatter chocolate over the hot slab and spread it once it melts. Top with chopped nuts.
Fudge is about crystals. Cook to soft ball, let it cool undisturbed to about 110F, then beat it until it loses its gloss and thickens. Beat too early and it turns grainy.
Hard candy is sugar, corn syrup and water cooked to about 300F, then flavored and colored off the heat. Add flavoring oils carefully; the steam is strong. Pour into oiled molds with sticks in place. Humidity is the enemy: hard candy turns sticky in damp air, so make it on a dry day and wrap pieces as soon as they cool.
Marshmallows need a stand mixer. Bloom gelatin in water, cook sugar syrup to about 240F, then pour it into the gelatin and whip for 10 to 12 minutes until thick and glossy. Spread it in a pan dusted with powdered sugar and cornstarch, rest it overnight, and cut with an oiled knife.
Sugar crystals formed too early. Usually it was stirred while cooling, beaten while still too hot, or sugar crystals on the pan's sides fell back in. Wash the sides down with a wet pastry brush while cooking, let fudge cool undisturbed to about 110F, then beat.
Why is my hard candy sticky?
Humidity, or it didn't reach hard crack (300 to 310F). Hard candy pulls moisture from the air, so make it on a dry day, cook it fully, and wrap or seal pieces as soon as they cool.
Do I need corn syrup?
For most beginner candy, yes. It's an invert sugar that stops sucrose from crystallizing, which keeps caramels smooth and hard candy clear. Light corn syrup isn't the same as high-fructose corn syrup. Glucose syrup works the same way.
Is a digital thermometer better than a clip-on?
Usually. Digital probe thermometers are easier to read, faster and often more accurate, and alarm models beep at your target. Clip-on dial thermometers are cheap and stay in the pot hands-free. Either is fine once you've tested it in boiling water.
How do I clean a pot of hardened sugar?
Fill it with water and bring it to a boil. The sugar dissolves in a few minutes. Don't scrub or chip at it, and never put a hot sugar pot straight into cold water.
JustBeginning earns commission from affiliate programs. As an Amazon
Associate, we earn from qualifying purchases. This costs you nothing
extra and doesn't change our recommendations.
Prices and availability are accurate as of the date and time
shown and can change; the price on Amazon when you buy is what
applies.
How this works.
Our top pickTempDip Digital Candy Thermometer with Pot Clip

 Best starter