So you're getting into streaming and content creation
You've decided to start a podcast, launch a YouTube channel, or go live on Twitch. The good news: audio quality matters far more than video quality, and a $100 USB mic sounds shockingly professional. Here's exactly what to buy first, and what to skip until you've found your audience.
By Colin B. · Published June 10, 2026 · Last reviewed June 10, 2026
Elgato Key Light Air
— Elgato Key Light Air: soft, adjustable studio lighting with no ring-light shadows.
Budget total
$100
Typical total
$350
A USB mic alone gets you to broadcast-quality audio for around $100. Add a webcam and a ring light and you're at $300-350 for a full setup.
We earn commission on qualifying Amazon purchases — see our
affiliate disclosure.
Price tiers and budget totals shown above are editorial estimates;
actual Amazon prices vary.
At a glance
Our top pick in each category
The fastest path through this guide — each best-starter pick by category.
Scroll for the budget and upgrade alternatives.
Audio matters more than video. Viewers will tolerate mediocre 720p video. They will click away from bad audio in thirty seconds. Buy a real microphone before you buy anything else.
Start USB, not XLR. An XLR microphone requires a separate audio interface ($150+) and involves gain staging, phantom power, and cable management. A USB mic is plug-and-play and sounds excellent for the first year. Move to XLR when you've outgrown it.
You don't need a capture card if you're streaming from a PC. Capture cards are for console streamers (PlayStation, Xbox, Switch) who want to route game footage through a separate streaming PC. If your game runs on the same machine you stream from, skip this category.
Your microphone is the single most important piece of streaming gear. Bad audio drives viewers away faster than bad video. The fundamental choice is USB vs. XLR: USB mics plug directly into your computer, require no extra gear, and sound excellent. XLR mics connect to an audio interface, give you a higher sound ceiling, and reject room noise better, but cost $150 more to get started. Start USB. Upgrade to XLR when your channel is growing and you can hear the difference.
Microphones — what's the difference?
A few common shapes, each making a different trade.
USB Condenser
Plug-and-play clarity. The default for most beginners.
Connection
USB
Setup needed
None
Price range
$100-$150
Best for Beginners, podcasters, quiet rooms
Tradeoff Picks up more room noise than a dynamic mic
The Blue Yeti is the most popular streaming mic for good reason: USB, zero setup, four pickup patterns (use cardioid for streaming), and a physical gain knob and headphone jack right on the mic body. It picks up room noise if your space is loud, but in a quiet room it's the fastest path to broadcast-quality audio.
What we like
USB plug-and-play on Windows and Mac, zero driver install
Built-in headphone jack for zero-latency real-time monitoring
Physical gain knob on the mic body, no software required
What to know
Picks up keyboard clicks; keep it 6-8 inches from your mouth
Heavy and tall; a boom arm helps position it correctly
★★★★☆Our rating· Only 15 left in stock - order soon.
Competes directly with the Blue Yeti at a similar price, often on sale for $10-20 less. The built-in shock mount reduces desk vibration noise, and the tap-to-mute sensor on top is faster than any software mute. Sound quality is nearly identical to the Yeti at this tier.
What we like
Built-in shock mount reduces desk-tapping and keyboard vibration
Tap-to-mute sensor on top is faster than software mute
What to know
RGB lighting software Windows-only; Mac users lose the controls
Bass-heavy response; voices can sound muddy if gain is too high
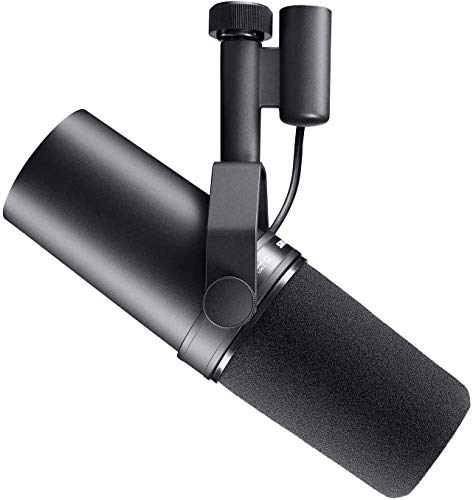
The SM7B is the microphone in most professional podcast and broadcast studios. XLR dynamic, so it rejects room noise, keyboard clicks, and HVAC hum that condenser mics pick up. Needs a proper audio interface (pair with the Focusrite Scarlett Solo). Buy this when you know streaming is long-term.
What we like
Dynamic capsule rejects room noise, keyboard clicks, and HVAC hum
Industry standard in professional broadcast and podcast studios
Built-in pop filter and swappable frequency-response plates included
What to know
XLR requires a separate audio interface; budget $300+ for the pair
Gain-hungry; cheap interfaces produce an audible noise floor
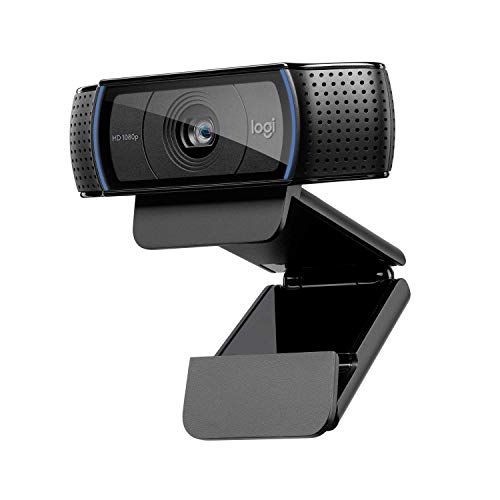
Webcam quality matters, but it's second to audio. An $80 webcam producing sharp, well-exposed 1080p is more than enough for the first year of streaming. The camera you see in most professional-looking streams is either a Logitech C920 with good lighting, or a mirrorless camera used as a webcam. Natural light from a window or a key light upgrades your image far more than doubling your webcam spend.
Best starter
Logitech
C920 HD Pro Webcam
$68.00 as of Jun 22, 2026
★★★★★Our rating· In Stock
The C920 has been the default streaming webcam for over a decade because it earns it: 1080p at 30fps, autofocus that works, and dual built-in stereo mics for emergency backup audio. It just works on every platform without driver drama. Most of what you see in professional-looking home setups is a C920 with good lighting.
What we like
1080p autofocus that tracks reliably without manual adjustment
Works plug-and-play on OBS, Streamlabs, Zoom, and every platform
Built-in dual stereo mics work as emergency backup audio
What to know
Struggles in dim light; pair with a key light for best results
Fixed focal length; can't adjust field of view in hardware
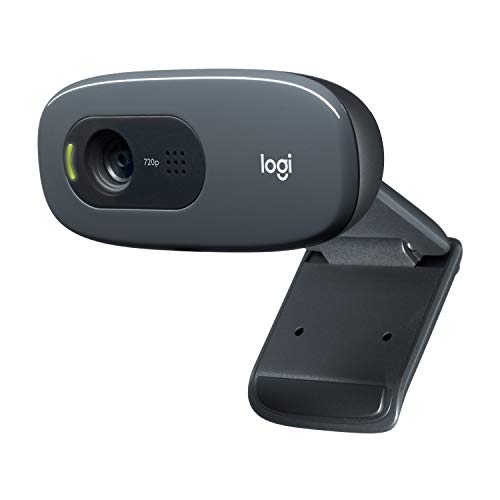
720p, around $30, and surprisingly watchable with good lighting. The C270 is the right call if you're not sure streaming will stick and don't want to spend $80 on a webcam before you know. Upgrade to the C920 within three months if you keep going.
What we like
Under $35 and plug-and-play on every platform with no setup
Good enough to start before committing to the hobby long-term
What to know
720p looks soft on high-res streams; viewers will notice eventually
Fixed focus; can't track movement or adjust depth of field
★★★★☆Our rating· Only 2 left in stock - order soon.
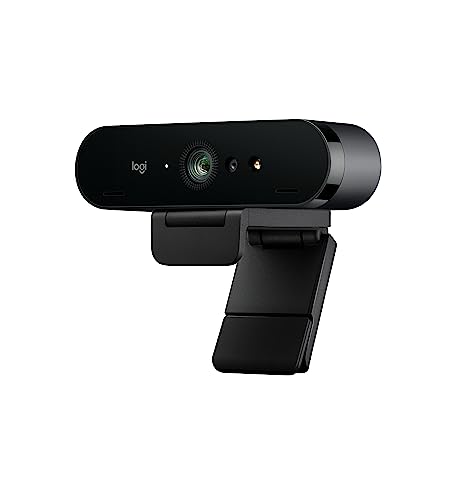
4K webcam with HDR and an adjustable field of view from 65 to 90 degrees in software. The real reason to buy the Brio is the HDR sensor: it handles mixed-light rooms without blowing out your face. Worth the upgrade once you've dialed in the rest of your setup.
What we like
HDR sensor handles mixed-lighting rooms without blowing out faces
Adjustable 65-90 degree field of view via Logitech software
4K capture for local recordings even when streaming at 1080p
What to know
4K streaming eats CPU and bandwidth; most stream at 1080p anyway
Costs $150+; only worth it after dialing in lighting first
Lighting is the single fastest way to upgrade how you look on camera. A $30 ring light transforms a grainy, shadow-filled webcam shot into something that looks intentional. Key lights are better than ring lights: they create soft, even illumination without the ring catchlight in your eyes that looks amateurish on close-up shots. Either one beats your window alone, and good lighting makes a $80 webcam look like a $500 camera.
Best starter
Elgato
Key Light Air
$$$
★★★★★Our rating
The Key Light Air is the standard for streamers who don't want a ring reflection in their eyes. Soft panel lighting, adjustable brightness and color temperature from 2900K to 7000K, and app-controlled from your phone. Clamps to your desk. It completely eliminates the dungeon-gaming look.
What we like
Soft panel eliminates ring-light catchlight reflection in eyes
Color temperature adjusts from warm 2900K to daylight 7000K
App-controlled via phone or pairs with a Stream Deck
What to know
Needs careful positioning; directly in front looks flat
Pricier than ring lights, but the quality difference is visible
Basics 10" Selfie Ring Light with Tripod Stand/2 Phone Holders Compatible with iPhone/QR Plate, Dimmable LED Ringlight Lighting for YouTube TikTok Vlog Video Recording Makeup Streaming, RP10-H
$
★★★★☆Our rating
If $35 is the budget and you want dramatically better light than your desk lamp, this Neewer ring light works. Three color modes, adjustable brightness, and a phone holder included. The ring reflection shows in your eyes on close-ups, which is the main reason to upgrade to a key light eventually, but it's barely noticeable on most streaming setups.
What we like
Under $35 and dramatically better than a desk lamp or window alone
Three color modes and adjustable brightness via included remote
What to know
Ring reflection visible in your eyes on close-up shots
The full-size Key Light gives more even coverage than the Air model, useful if your desk is wide or you sit farther from the camera. Same app control, same color temperature range, significantly larger panel. Most streamers are fine with the Key Light Air; this is for setups where the smaller light doesn't fill the frame evenly.
What we like
Larger panel for more even coverage on wide or deep desk setups
Same Elgato app control as the Air model, no learning curve
What to know
Overkill for most setups; the Air model covers 90% of use cases
Costs $200+; only upgrade when you can see the Air's limits
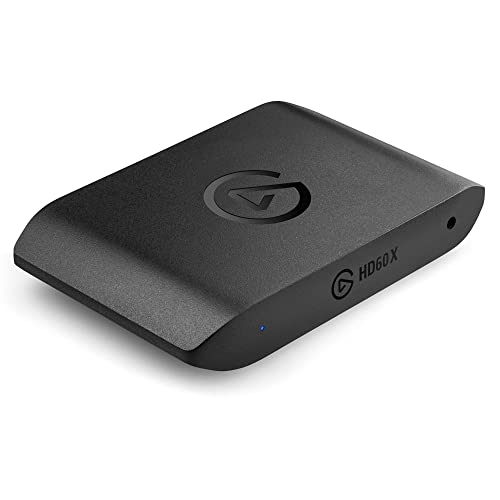
You only need a capture card if you're streaming console gameplay. A capture card sits between your PlayStation, Xbox, or Switch and your streaming PC, converting the HDMI signal into something OBS can use. If you play games on the same PC you stream from, skip this category entirely; OBS reads your screen directly. If you have a separate streaming PC, you'll want a card for each console you plan to stream.
Best starter
Elgato
HD60 X Capture Card
$169.61 as of Jun 22, 2026
★★★★★Our rating· Only 10 left in stock - order soon.
The HD60 X is the standard external capture card for console streamers. Captures up to 4K30 or 1080p60 with HDR passthrough to your TV, and works with OBS out of the box via USB-C with no separate power cable. If you're streaming PS5, Xbox Series X, or Switch and want the simplest setup, this is it.
What we like
4K30 or 1080p60 capture with HDR passthrough to your TV
USB-C, no driver install, recognized instantly in OBS
Works with PS5, Xbox Series X, and Nintendo Switch
What to know
External card; internal PCIe cards have slightly lower CPU overhead
Captures video only; you still need a separate mic for your voice
The LGP2 Plus can record 1080p60 directly to an SD card without a connected PC at all. For streamers running a solo console setup, that standalone mode is a real differentiator. Solid OBS support and costs $30-40 less than the Elgato HD60 X.
What we like
Records 1080p60 directly to SD card without a connected PC
Costs $30-40 less than the Elgato for equivalent PC capture
What to know
Standalone mode quirks vary by firmware; test before live events
Software interface less polished than Elgato's capture utility
A mic arm gets your microphone off the desk and positioned correctly in front of your mouth, which dramatically improves your audio. Mics on flat stands pick up desk vibration noise from keyboard, mouse, and coffee cups, and rarely sit at the right height. An arm also clears desk space. This is a $20-$100 purchase with outsized audio impact, and most USB mics include a poor desk stand you'll want to replace immediately.
Best starter
Rode
PSA1 Swivel Mount Studio Microphone Boom Arm
$94.00 as of Jun 22, 2026
★★★★★Our rating· In Stock
The Rode PSA1 is the boom arm in every professional podcast studio. Heavy-duty steel construction, smooth articulation, and a standard 5/8-inch thread that fits every condenser and dynamic mic. It holds a Blue Yeti without drooping over time, which is the most common failure mode of cheaper arms.
What we like
Heavy-duty steel holds a Blue Yeti without drooping over months
Standard 5/8-inch thread fits every mic on this page
Internal cable routing keeps your desk wire-free
What to know
Clamp fits desk edges up to 55mm; measure your desk first
Costs more than budget alternatives, but those droop within months
Under $20 and gets the job done for the first several months. Fits the Blue Yeti and most USB mics, clamps to any desk edge, and includes a 5/8-inch adapter. Expect some sag over time as the tension springs lose stiffness. Fine for starting out; upgrade to the Rode PSA1 when the drooping annoys you.
What we like
Under $20 and handles most USB condenser mics without issue
Includes 5/8-inch thread adapter and desk clamp in the box
What to know
Springs lose tension and arm droops within months on heavier mics
Entry-level build quality; creaking and stiffness appear over time
Your first month of streaming and content creation
Most beginners spend two weeks buying gear and zero minutes actually streaming. Here's what your first month looks like when you do it in the right order.
Most people who want to start streaming spend their first two weeks watching YouTube comparisons about microphones. Then they buy the wrong things in the wrong order, get frustrated by OBS, and quit before they’ve streamed a single hour.
This is what your first month actually looks like when you approach it correctly: what to do before you buy anything, what order to buy things in, and the specific technical problems you’ll hit and how to solve them.
Week 1: Start before you’re ready
Download OBS Studio before you buy a single piece of gear. It’s free, it runs on Windows, Mac, and Linux, and the point of running it first is to understand what you already have.
Open OBS. Add a scene. Add your webcam as a video source and your built-in microphone as an audio source. Hit “Start Recording” and talk for ten minutes. Watch it back.
That recording is your baseline. You will be surprised how watchable it is, and you’ll be equally surprised by exactly what’s wrong with it. Usually it’s one of three things: the audio is echoey and hollow, the room is too dark, or the microphone is so far from your mouth that you sound like you’re in a hallway.
This ten-minute exercise tells you more than an hour of reading reviews. Most of the time, the answer is: buy a microphone. The video is actually fine.
Once you’ve seen your baseline, order a Blue Yeti USB microphone. It arrives in two days and plugs directly into your USB port. No drivers, no setup, no audio interface. Open OBS, go to Settings > Audio, set it as your microphone input, and you’re done.
The one thing you need to do that the box won’t tell you: set the pickup pattern to cardioid. There’s a dial on the back of the mic. The cardioid symbol looks like a heart shape. That’s the setting that captures your voice and ignores what’s behind the mic. The other patterns (stereo, omnidirectional, bidirectional) exist for specific recording scenarios you probably don’t have yet. Leave them alone.
Position the mic 6 to 8 inches from your mouth, angled slightly upward. Not directly in front of your face, tilted slightly to the side so you’re not breathing directly into the capsule. This positioning alone eliminates 80% of the “bad mic sound” complaints beginners have.
Do another ten-minute recording. Compare it to week one. The difference should be dramatic.
A note on gain: the gain knob on the Yeti controls how sensitive the mic is. If your voice is too quiet, turn it up. If OBS shows the audio meter going into the red, turn it down. The target is a signal that peaks around -12 to -6 dB during normal speech, with the meter in the green-to-yellow range. That’s it.
Add a webcam after your audio is dialed in. The Logitech C920 is the standard: 1080p, autofocus, works immediately in OBS as a video source without any setup.
The single most impactful thing you can do for your video is not the camera. It’s the light. Position a window to your side (not behind you), or buy a key light or ring light and put it at face level, slightly off to one side. What your camera sees is limited by what light exists in the room. A $30 ring light pointing at your face transforms what a $80 webcam produces.
In OBS, add your webcam as a video source and position it in your scene layout. Most beginners use a full-screen webcam or a corner-of-screen overlay on gameplay. Both are fine. The specific layout matters less than getting something that works and doing your first stream.
The technical problem you will definitely hit: OBS scenes and sources are confusing the first time. A “scene” is a full layout (for example, “Gameplay with cam overlay”). A “source” is an element inside a scene (webcam, screen capture, microphone). You switch between scenes during a stream. You don’t need more than two scenes to start: one for when you’re live and one for a “Be Right Back” screen when you step away.
Week 4: Go live
By week four, you have working audio and video, a basic OBS setup, and one or two test recordings. Go live.
The specific platform matters less than you think. Twitch for gaming, YouTube for anything else, is the simplest heuristic. Both have free accounts, both work with OBS via the built-in stream key in Settings > Stream. Twitch gives you a basic dashboard where you set a title and go. YouTube requires you to enable live streaming 24 hours in advance the first time.
Set your stream title, click “Start Streaming” in OBS, and stream for at least 30 minutes. Don’t stop because something is imperfect. Imperfect is the point. The technical problems you encounter in a real live stream are impossible to find in a test recording: latency, chat interaction, OBS notifications, audio suddenly cutting out when a game opens in fullscreen. You need reps to find them.
Expect these things to go wrong in your first few streams:
Audio cuts out when a game launches (fix: set audio output in OBS to the correct device, not “Default”)
Your microphone picks up game audio (fix: put the mic farther from your speakers, or use headphones)
OBS drops frames (fix: lower your output resolution from 1080p to 720p until your PC handles it)
Nobody watches (this is normal; every channel starts at zero)
Most beginners do this backward: they buy everything, learn OBS last, and then struggle because they can’t isolate which part of their setup is causing problems.
The order that works is:
Learn OBS with your laptop mic (week 1)
Add a real microphone (week 2)
Add webcam and lighting (week 3)
Go live (week 4)
Each step isolates a variable. When your audio is bad in week one, you know it’s the mic. When it’s still bad in week two, you know it’s your positioning. You can’t troubleshoot a setup you assembled all at once.
The one thing that separates content creators who are still going six months from now from the ones who quit: they streamed before they were ready, found what needed fixing, and fixed one thing at a time.
Save your money
What you don't need yet
Beginners get pressured to buy a lot of stuff that doesn't help them play
better. Here's what we'd skip on day one.
A mirrorless camera as webcam — A $1,200 camera through a cheap lens in bad lighting looks worse than an $80 C920 with a good key light. Sort out your lighting before upgrading your camera.
Acoustic foam panels — Mic placement and a dynamic microphone do far more for your audio than foam on walls. Treat the room after you've optimized the mic.
A Stream Deck — Genuinely useful once you've built a multi-scene OBS layout with transitions and alerts. Not useful on day one when you have one scene.
A hardware audio mixer — OBS's built-in audio mixer handles everything a solo streamer needs. Hardware mixers add complexity without real benefit until you're running multiple audio sources.
A green screen — OBS virtual backgrounds work well now without one. Add a green screen only when you need precise cutouts for overlays or chroma-key effects.
First week
Your first seven days
A short, real plan to get from gear-on-doorstep to actually playing.
Download OBS Studio. Free, open-source, runs on Windows, Mac, and Linux. It's the streaming standard. · Action
OBS Studio · Free streaming and recording software
Do a 10-minute test recording with just your laptop microphone and built-in camera. Watch it back. That's the baseline you're improving. · Action
Order the Blue Yeti USB Microphone. Audio first, everything else second. · Buy
Go live for at least 30 minutes, even if nobody watches. The technical problems you discover in a real stream are impossible to find in a test recording. · Action
FAQ
Common questions
What's more important: microphone or camera?
Microphone, by a lot. Viewers tolerate grainy 720p video. They click away from bad audio in under 30 seconds. Buy a real microphone before you upgrade anything else.
Do I need a capture card?
Only if you're streaming console gameplay through a separate PC. If you're playing on the same PC you stream from, OBS reads your screen directly and no card is needed. PS5, Xbox, and Switch streamers routing through a second PC need one.
Should I start with USB or XLR?
Start USB. A Blue Yeti or HyperX QuadCast S sounds excellent and costs $100-150. XLR requires a $150 audio interface on top of the mic cost, plus gain staging knowledge. Move to XLR when USB is genuinely limiting you, which probably won't happen in your first year.
What software do I use to stream?
OBS Studio, free and open-source on Windows, Mac, and Linux. It's the standard for almost every serious streamer. Streamlabs and Twitch Studio are friendlier for beginners but have fewer features. Start with OBS; most people figure it out in an afternoon.
How do I reduce echo in my recordings?
Three moves: get closer to the mic (6-8 inches for cardioid USB mics), switch to a dynamic mic like the HyperX QuadCast S that rejects room noise, or add soft surfaces to the room (carpet, curtains, bookshelves). Foam panels help but aren't the first fix.
How much does it cost to start streaming?
A Blue Yeti and OBS gets you streaming with excellent audio for around $130. Add a C920 webcam ($80) and a Neewer ring light ($35) for a complete setup around $245. The Key Light Air upgrade brings you to roughly $360.
As an Amazon Associate, JustBeginning earns from qualifying purchases.
We may also earn commission from other affiliate programs linked on this
page. Editorial recommendations are independent; we don't choose
products based on commission rates.
Product prices and availability are accurate as of the date and time
indicated and are subject to change. Any price and availability
information shown on Amazon at the time of purchase will apply.