Mosaics are one of the most forgiving art forms you can pick up: cut some tiles, glue them down, fill the gaps with grout. The results look striking from your first project, and the craft scales from a $20 practice piece to a backyard installation. Here's what you actually need to start.
By Colin B. · Published June 8, 2026 · Last reviewed June 8, 2026
A complete first project runs $55-110: wheeled nippers (~$20), adhesive (~$12), grout (~$15), a glass tile pack (~$20), and a wood panel (~$8). The tools last years; only tesserae and grout get consumed.
We earn commission on qualifying Amazon purchases — see our
affiliate disclosure.
Price tiers and budget totals shown above are editorial estimates;
actual Amazon prices vary.
At a glance
Our top pick in each category
The fastest path through this guide — each best-starter pick by category.
Scroll for the budget and upgrade alternatives.
Start with a small project. Your first mosaic should fit on a 6×8 inch board, not a kitchen backsplash. Small pieces let you learn cutting rhythm, adhesive open time, and grout consistency before committing to a large surface.
Wheeled glass nippers and hardware-store tile nippers are not the same tool. Standard tile nippers (spring-loaded jaws) work, but cuts wander on curved lines and thin strips. Wheeled nippers give you precise control at the contact point. If you buy one upgrade immediately, make it nippers.
Your grout color is half the composition. A warm tan grout and a cool charcoal grout turn the same tile arrangement into two completely different pieces. Buy a small bag in two different colors and test on a scrap board before you commit to your finished piece.
The tesserae are the pieces that make the mosaic, glass tiles, ceramic squares, stone, or found material. For beginners, vitreous glass tiles (about 3/4 inch square, 4mm thick, consistent dimensions) are the right starting material. The uniform thickness means your grout lines stay even without shimming, and wheeled nippers cut them cleanly. Ceramic tiles are cheaper and more forgiving if you're still learning to cut. Save smalti and specialty stone for later, variation in thickness makes grouting genuinely harder on your first piece.
Tesserae — what's the difference?
A few common shapes, each making a different trade.
Rich, irregular surface for professional-looking work. Learn on glass first.
Thickness
6-8mm (irregular)
Typical size
Irregular chips
Cut ease
Harder
Best for Fine art projects, traditional Italian mosaic aesthetic
Tradeoff Thickness variation complicates grouting, not a beginner's starting point
Best starter
Mosaic Mercantile
Vitreous Glass Tiles (1 lb Variety Pack)
$$
★★★★★Our rating
The go-to starter tessera for mosaicists worldwide. Vitreous glass is consistent in thickness, the secret to even grout lines, cuts cleanly with wheeled nippers, and comes in a spectrum of colors that stay vivid indefinitely. A one-pound variety pack has enough material to finish a 6×8-inch piece with room to experiment with color layout.
What we like
Consistent 4mm thickness keeps grout lines even without shimming
Vivid colors that won't fade, chip, or stain over decades
Clean-cutting with wheeled nippers, minimal chipping or waste
What to know
Edges stay sharp until grouted; sort carefully before layout
Variety-pack colors are fixed; order specific hues separately
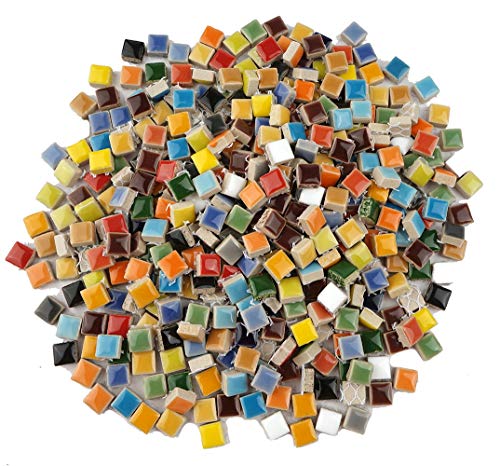
Colorful Square Ceramic Mosaic Tiles for Crafts (784 Pieces)
$18.96 as of Jun 22, 2026
★★★★☆Our rating· In Stock
784 small glazed ceramic squares in a mix of colors. Good for practice cuts before committing to glass, and the variety lets you experiment with color combinations cheaply. The pieces are smaller than standard mosaic tessera, which makes them useful for detail work and borders on your first few projects.
What we like
784 pieces in a color mix, good for experimenting with palettes
Glazed surface is clean and easy to handle during layout
What to know
Smaller than standard 3/4 inch tessera; size up to glass for main coverage
Glazed finish is harder to adhesive-bond than unglazed; rough up first
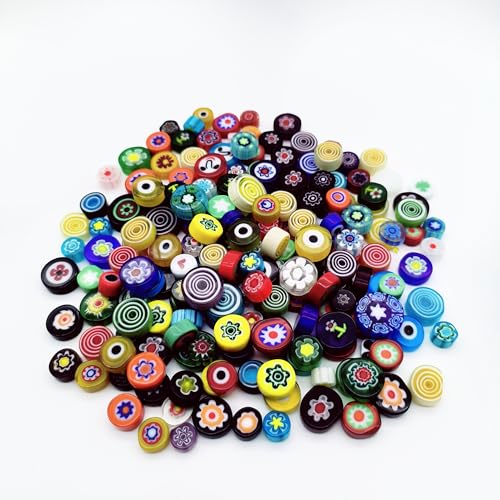
Flat Glass Millefiori Tiles for Mosaic Making (Assorted Flowers, ~95 pieces)
$11.99 as of Jun 22, 2026
★★★★☆Our rating· In Stock
Small glass rods sliced to reveal intricate cross-section patterns, flowers, stars, geometric spirals. You glue them whole as accents; no cutting required. A handful of millefiori scattered across an otherwise simple mosaic changes the whole character of the piece for minimal cost. Not for structural coverage, but for the details that make a mosaic look handmade and deliberate.
What we like
Intricate cross-section patterns that look expensive for the price
No cutting needed; glue whole as decorative focal points
What to know
Accent-only use; too thick and pricey for full coverage
Pattern selection varies by batch; order extras for continuity
Wheeled glass nippers are the fundamental mosaic tool. Two carbide wheels grip a tile and score a clean break exactly at the contact point, more predictable than standard tile nippers, which let cuts wander. The technique takes about two projects to feel natural, but once it clicks you can reliably cut to an intended line. Hardware-store tile nippers work for your first experiment; for anything beyond that, wheeled nippers are worth the $20. Always wear safety glasses when cutting, small glass chips fly.
Best starter
Jennifer's Mosaics
Wheeled Glass Mosaic Nippers
$28.73 as of Jun 22, 2026
★★★★★Our rating· Only 2 left in stock - order soon.
Two carbide wheels score a clean break right at the contact point. This is the fundamental mosaic tool, every piece you make comes through it. Jennifer's Mosaics nippers cut vitreous glass and soft ceramic cleanly without skating or crushing. One pair lasts for years of regular project work.
What we like
Carbide wheels give controlled, precise cuts at the contact point
Handles vitreous glass and soft ceramic cleanly without crushing
Spring-return action reduces hand fatigue on long cutting sessions
What to know
Wheels dull on thick porcelain; best kept to glass and soft ceramic
Steeper learning curve than standard nippers, takes a few sessions
9 in. Compound Tile Nipper with Tungsten Carbide Tips
$24.97 as of Jun 22, 2026
★★★★☆Our rating· Only 12 left in stock (more on the way).
Available at every hardware store under $15, and adequate for scoring ceramic and softer glass. Cuts are less controlled than wheeled nippers, they wander on long straight lines and thin strips, but they're fine for a first practice piece. Upgrade to wheeled nippers after two or three projects.
What we like
Under $15 and available at hardware stores without waiting on shipping
Compound leverage makes cutting thick ceramic easier than expected
What to know
Cuts wander on curves and thin strips; less precise than wheeled nippers
Heavier compound action with replaceable tungsten carbide wheels. The additional leverage matters when you're cutting 50 pieces in an afternoon, noticeably less hand strain than standard wheeled nippers. The replaceable tips are the main selling point; you'll never buy a new pair, just new wheels.
What we like
Compound leverage cuts thick stone and smalti without hand strain
Replaceable tungsten carbide tips extend the tool's life indefinitely
What to know
Overkill for glass and thin ceramic, the mid-tier nippers do that fine
Heavier grip loses some tactile feel for delicate fine cuts
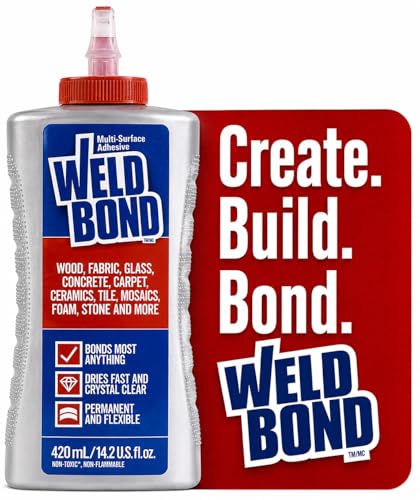
What you glue with depends entirely on where the finished mosaic will live. For indoor pieces on wood or MDF, Weldbond is the professional-grade PVA adhesive most serious hobbyists use: water-based, water-cleanup, repositionable for about 10 minutes, and it cures clear and flexible. For outdoor work, a birdbath, garden stepping stone, or patio feature, Weldbond fails when it freezes. Use polymer-modified thinset instead, the same product tile setters use in wet installations. Don't substitute; an outdoor piece with Weldbond will start losing tiles in its first winter.
Best starter
Weldbond
Multi-Surface Strong Glue (14.2 oz)
$
★★★★★Our rating
The standard indoor mosaic adhesive among serious hobbyists. Water-based, dries clear and flexible, and gives you about 10 minutes to reposition tesserae after placing them, that forgiveness is valuable while you're learning. One 14-oz bottle covers several small projects. Do not use outdoors.
What we like
10-minute open time lets you reposition tesserae while you learn
Dries clear and flexible, invisible in finished work
Water cleanup; no solvents needed on your hands or tools
What to know
Not for outdoor or wet-area projects, freezes will break the bond
Thin consistency means vertical surfaces need tape to hold pieces
★★★★☆Our rating· Only 10 left in stock - order soon.
When your mosaic will live outside, a birdbath, garden stone, or patio art, thinset is the only adhesive that survives freeze-thaw cycles and persistent moisture. Mix to peanut-butter consistency, work in small sections, and your piece will still be intact in ten years. Buy the smallest bag; a little goes a long way.
What we like
Polymer-modified for superior bond strength on outdoor surfaces
Frost-resistant; the only adhesive that survives full outdoor exposure
What to know
Requires mixing and sets quickly; no forgiveness window for repositioning
Much messier than PVA; dedicated gloves and work surface required
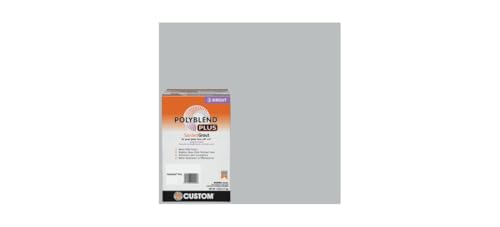
Grout fills the gaps between tesserae and is the step beginners fear most, because spreading gray paste over a finished mosaic looks like a disaster right before it looks right. It's not as scary as it looks. Sanded grout (for gaps 1/8 inch or wider, which is most mosaic work) mixes with water, spreads diagonally across the surface, firms up in 15 minutes, then wipes clean with a damp sponge. Choose your grout color deliberately: warm tan and cool charcoal turn the same tile arrangement into two entirely different compositions.
Best starter
Custom Building Products
PolyBlend Plus Sanded Tile Grout
$
★★★★★Our rating
The workhorse sanded grout that mosaicists have used for decades. Mix with water to a peanut-butter consistency, spread diagonally over the piece, let it firm up, and wipe clean. The 7-lb bag covers a dozen small projects, stores dry for months, and comes in 40+ colors so you can choose a tone that sets off your palette.
What we like
40+ color options let you pick a grout tone that enhances your palette
7-lb bag covers a dozen small projects; stores dry for months
Consistent texture and trusted brand used widely in the trade
What to know
Sanded grit scratches polished glass or mirror tile surfaces
Dry-mixing releases silica dust; wear a mask, every time
★★★★☆Our rating· Only 4 left in stock - order soon.
Ready-to-use from the tub, no measuring, no mixing, no silica dust. The texture right out of the container works well on flat pieces and the finish is smooth and stain-resistant. More expensive per project than dry mix, but for a beginner's first piece where you want to remove variables, it earns the premium.
What we like
No mixing or measuring, scoop directly from the tub and apply
No dry-mixing silica dust exposure; safer workshop environment
What to know
More expensive per project than dry-mix grout
Shorter shelf life once opened; use within 90 days of opening
For projects where your tesserae are polished glass, mirror, or placed very close together (gaps under 1/8 inch), unsanded grout is the right call. The fine texture won't scratch polished surfaces and flows into narrow gaps that sanded grout can't reach. Keep a small bag of this alongside your sanded supply.
What we like
Won't scratch polished glass, vitreous tile, or mirror surfaces
Flows into very narrow gaps that sanded grout misses
What to know
Less structural strength than sanded; not for gaps wider than 1/8 inch
Fewer color options than sanded grout product lines
Every mosaic needs a substrate to glue onto. For most beginner projects, 1/4-inch birch plywood is the ideal base: rigid enough not to flex under grout weight, light enough to hang, and available cut-to-size at any home center. MDF is a close second, smoother surface, slightly better adhesion, but it swells at the edges in humid conditions. Avoid foam board or cardboard, which flex and absorb moisture. The one exception: outdoor garden stepping stones cast in a concrete form are their own category entirely and don't use a wood base at all.
Best starter
Walnut Hollow
1/4" Birch Plywood Craft Panels (6-Pack, 12" x 12")
$
★★★★★Our rating
Pre-cut 1/4-inch birch panels in a 6-pack give you multiple project-sized surfaces at once. The rigid birch ply doesn't flex under the weight of tesserae and grout, and it accepts Weldbond adhesive without any prep. Seal the back with any acrylic medium after grouting to prevent moisture wicking over time.
What we like
Rigid, won't flex under grout weight and tesserae coverage
Pre-cut sizes mean no measuring or sawing for small projects
Accepts Weldbond adhesive directly without surface preparation
What to know
Back must be sealed after grouting to prevent moisture damage
Edges can splinter if cut; sand smooth before laying tesserae
11x14 inch MDF Chipboard Sheets (6-Pack, 1/4 inch)
$
★★★★☆Our rating
Smooth on both surfaces for excellent adhesive contact, no splintering risk at the edges. The 11x14 inch size is a good first-project canvas, and the 6-pack gives you multiple attempts without additional ordering. Seal all edges before starting if your finished piece will sit in a humid space.
What we like
Smooth surface on both sides for excellent adhesive contact
No splintering at cut edges, safer to handle during layout
What to know
Swells in moisture; keep away from humid spaces without sealing all edges
A mosaic is just a puzzle you design yourself: cut the pieces, glue them down, grout the gaps. The first one takes a weekend. Here's the rhythm that makes it click.
Mosaics look intimidating from the outside. You see finished work on Instagram (intricate portraits, sweeping garden walls, Byzantine floor panels) and assume there’s a steep technical entry. There isn’t, not for the first project. The core loop is simple: cut a tile into a smaller shape, glue it to a board, repeat until your design is covered, grout. That’s the whole thing.
Your first piece will take a weekend and look genuinely good. Here’s what that weekend actually looks like.
Saturday morning: cutting and layout
The first tool to get comfortable with is the wheeled nippers. Two carbide wheels grip the tile and score a break at the contact point. The technique is: position the wheels where you want the break, squeeze firmly and steadily, and let the tile snap. Don’t rush it. The first 10 tiles will feel unpredictable. By tile 30 you’ll hit your intended line most of the time.
Cut your practice tiles before you commit to your design. Get a handful of cheap ceramic squares, sit at your work table, and spend 20 minutes just cutting. Straight cuts, diagonal cuts, cutting a square into a triangle. You need to build a feel for how much pressure to apply and where cuts tend to drift. Glass cuts cleaner than ceramic; vitreous glass is the most predictable material you can work with as a beginner.
Your board should be sketched in pencil before any glue touches it. This sounds obvious but most beginners skip it. Sketch your design on the wood panel, including where the major color regions go. Lay out a section of dry tesserae before gluing to see how the colors actually interact. Colors that look good in the bag often compete when placed side by side. Move tiles around until the layout feels right. Only then get out the Weldbond.
A few layout principles that will save you frustration:
Work in sections. Glue one 3×3 inch area at a time. Weldbond has a 10-minute open time; don’t try to spread adhesive across the whole board.
Leave even gaps. Consistent spacing between tesserae (about 1/8 inch) means cleaner grout lines. Use a ruler or a tile spacer as a guide until your eye calibrates.
Start with geometric patterns. Straight lines, repeating grids, concentric shapes. Curves and portraits are harder than they look. Save them for project two.
Saturday afternoon: waiting (the productive kind)
Weldbond takes 24 hours to cure fully. This sounds like a nuisance but it’s actually useful. It gives you time to step away and evaluate the piece with fresh eyes. You’ll spot the color imbalance you were too close to see while working. You’ll decide a section isn’t right. You can pry off tiles carefully in the first few hours if the adhesive hasn’t set, but don’t rearrange aggressively; work slowly.
This is also the time to decide your grout color. If you haven’t done this yet, lay a piece of gray tape and a piece of tan tape across sections of your dry piece and photograph it. The grout changes everything. Warm buff grout reads earthy and soft; cool charcoal grout makes colors pop and looks more contemporary. Neither is wrong. You just have to choose before Sunday.
This is the step beginners fear most. Spreading wet gray mortar over a piece you spent all day on looks like a disaster. It is not a disaster. Here’s the actual process:
Mix sanded grout with water in a small container until it’s the consistency of peanut butter. No lumps.
Use a spatula or grout float to spread it diagonally over the mosaic surface. Press it into the gaps.
Wait 10-15 minutes until the grout firms up and loses its sheen.
Wipe with a damp (not wet) sponge in circular motions. Rinse the sponge often. The grout haze will smear before it clears. Keep going.
After a final wipe, let dry for an hour, then buff with a dry cloth to remove any remaining haze.
The grout that’s in the gaps will not wipe away; it’s firmed up. The grout on the flat tile faces will come off clean. The piece comes back to you.
One thing that surprises beginners: the grout color lightens significantly as it dries. What looks like a dark charcoal wet will dry to a medium gray. Test a small sample first if you’re unsure.
What your first piece will teach you
The technical loop isn’t where the real learning happens. What a first piece teaches you is design. You’ll finish and immediately see what worked and what didn’t: colors that fight each other, a section where the spacing went uneven, a corner that looks rushed. That’s useful. That’s the information you need to make the second piece better.
Most mosaicists say their second piece is noticeably more confident than their first, because they know the whole process before they start. You’ll plan the layout more carefully, choose your grout color earlier, and cut with more intention. The first piece exists to give you that knowledge.
Try a different base. After a flat board piece, cast a stepping stone in a premade concrete form. The same skills apply; the material is more forgiving and the result lives in your garden for years.
Work on a larger scale. A 12×12 piece isn’t twice as hard as a 6×8. The process is the same, just longer. Your second project is the right time to go bigger.
Learn the indirect method. Direct method (gluing straight to the base) is what you just did. Indirect method (gluing face-down on paper, then transferring to the final surface) lets you work flat on a table and install vertical surfaces. Useful for walls and three-dimensional pieces.
You made a mosaic. The pieces you sorted, cut, and arranged will outlast most things you own.
Save your money
What you don't need yet
Beginners get pressured to buy a lot of stuff that doesn't help them play
better. Here's what we'd skip on day one.
A wet tile saw — Wheeled nippers handle everything a beginner needs to cut. A wet saw is for thick stone slabs and large-format tile installations, not hobby mosaic work.
A craft store beginner mosaic kit — These bundle tiny amounts of mediocre tile, weak adhesive, and pre-grout with a 300% markup. Buy each component separately and get five times the material for the same money.
Imported Italian smalti — Beautiful material, but its irregular thickness makes grouting genuinely difficult. Learn on vitreous glass first; smalti will still be there once you have a feel for the craft.
A dedicated mosaic easel or light table — Your kitchen table and a piece of cardboard to protect the surface are all you need. This is a tool for professionals doing large commissions.
Grout release or impregnator spray — A thorough wipe-down with a damp sponge cleans grout haze off vitreous glass without any additives. Save this for polished stone tesserae, which you won't use as a beginner.
First week
Your first seven days
A short, real plan to get from gear-on-doorstep to actually playing.
Order nippers, adhesive, and a tile pack together, these three arrive and you can start. · Buy
Around $55-80 for the complete first-time kit: wheeled nippers (~$20), Weldbond adhesive (~$12), a glass tile variety pack (~$20), sanded grout (~$10), and a small wood panel (~$8). The tools last for years; you only restock tiles and grout.
Can I use floor tiles or leftover tile from a hardware store?
Yes, with caveats. Glazed ceramic floor tile works fine but cuts less cleanly than mosaic-specific tiles, and the glaze can make adhesion tricky. Avoid porcelain tile as a beginner, it's much harder to cut and will destroy your nippers quickly.
Do I need a special workspace for mosaics?
Any stable table works. Put down a silicone mat or cardboard to protect the surface. You'll generate tile chips when cutting, work on a tray or inside a shallow cardboard box to contain them. Good lighting matters more than dedicated space.
What's the difference between sanded and unsanded grout?
Sanded grout is for gaps 1/8 inch or wider, the standard for most mosaic work. Unsanded grout is for narrower gaps or polished surfaces that sanded grit would scratch. Start with sanded for vitreous glass or ceramic tesserae with standard spacing.
How long does a mosaic take to make?
A 6×8 inch piece takes 3-5 hours spread across a weekend: an hour for cutting and layout, an hour for gluing, 24 hours of adhesive cure time, then 30 minutes for grouting and cleanup. The cure time is waiting, not work. Your first piece will be done before the next weekend.
Can I put a mosaic outside?
Yes, but you need thinset adhesive (not Weldbond) and exterior-rated grout. Weldbond fails when it freezes. For outdoor pieces, use polymer-modified thinset and seal the finished grout with a silicone-based sealer annually. A properly made outdoor mosaic can last decades.
Society of American Mosaic Artists (SAMA) — The main professional body for mosaic art in the US. Gallery, artist directory, and periodic workshops. Useful for finding instructors once you've made your first pieces.
Mosaic Art Supply, Blog & Tutorials — One of the best free tutorial collections online. Practical technique guides on cutting, grouting, and sealing written by working mosaicists.
r/mosaics — Active beginner-friendly community. Good for identifying mystery tesserae, troubleshooting grout problems, and seeing what other first-project pieces actually look like (encouraging).
Wanda Chaves Mosaics (YouTube) — Clear, no-frills technique videos covering vitreous glass, indirect method, and grouting. Start with her beginner series before attempting anything beyond a flat panel.
The Complete Mosaic Handbook, Meera Dowd — The reference book most frequently recommended in the SAMA community. Projects scale from coasters to wall installations, with thorough material coverage.
As an Amazon Associate, JustBeginning earns from qualifying purchases.
We may also earn commission from other affiliate programs linked on this
page. Editorial recommendations are independent; we don't choose
products based on commission rates.
Product prices and availability are accurate as of the date and time
indicated and are subject to change. Any price and availability
information shown on Amazon at the time of purchase will apply.
Our top pickJennifer's Mosaics Wheeled Glass Mosaic Nippers