Starting seeds indoors gets you tomatoes, peppers and flowers weeks ahead of the garden center, in varieties you'll never find there, for the price of a packet. You need light, warmth and the right mix. Here's the setup to buy, how close the light really goes, and the mistakes that cause leggy, floppy seedlings.
By Colin B. · Published November 5, 2026 · Last reviewed November 5, 2026
A small LED light, a tray kit, seed-starting mix and a timer get one tray going for about $65. Our recommended light, a heat mat with thermostat, better mix and a fan land around $140, and all of it lasts for years.
We earn commission when you buy through links on this page, including
Amazon. See our affiliate disclosure.
Price tiers and budget totals shown above are editorial estimates;
actual prices vary.
At a glance
Our top pick in each category
The fastest path through this guide — each best-starter pick by category.
Scroll for the budget and upgrade alternatives.
A sunny window isn't enough. Seedlings on a windowsill stretch toward the glass and turn tall, pale and floppy. A cheap LED light hung a few inches above the trays and run 14 to 16 hours a day does far more than any other purchase.
Use seed-starting mix, not potting soil or garden soil. Seed mix is fine and light, so tiny roots push through it easily, and it's sterile, which helps prevent damping off, the fungus that topples seedlings overnight.
Check your last frost date before you sow. Tomatoes go in about 6 to 8 weeks before it, peppers 8 to 10. Start too early and you'll be nursing overgrown plants in your kitchen for a month.
The gear
What you actually need
Grow Lights
Light is the thing that makes or breaks seedlings. Simple LED strips are cheap, run cool, and can hang just a few inches above the plants, which is what keeps them short and sturdy. Panel lights cover more area and suit bigger setups. Put lights on a timer for 14 to 16 hours a day, and raise them as seedlings grow.
Grow Lights — what's the difference?
A few common shapes, each making a different trade.
LED strips
Linkable T5-style LED tubes hung close over trays. Cheap and cool-running.
Four linkable 2 ft LED strips for about $43, the right length to cover a standard 10 by 20 inch seed tray. They run cool enough to hang 2 to 4 inches above seedlings, which is exactly what keeps them stocky. 7,000+ reviews.
A dimmable 100 W panel that covers a 2 by 2 to 3 by 3 ft area, so several trays at once, and keeps plants going well past the seedling stage. About $70, 12,400+ reviews.
Most seeds sprout faster and more evenly in warm soil, especially peppers, tomatoes and eggplant, which can sulk for weeks in a cool room. A heat mat under the tray warms the soil to about 75 to 85°F. Get one with a thermostat so it can't cook the seeds, and take trays off the mat once most seeds have sprouted.
Best starter
VIVOSUN
10x20.75 Seedling Heat Mat and Digital Thermostat Combo
$26.34 as of Nov 5, 2026
★★★★★Our rating· In Stock
A waterproof mat sized for a standard tray, with a digital thermostat and probe that holds the soil at the temperature you set. About $26, 15,000+ reviews.
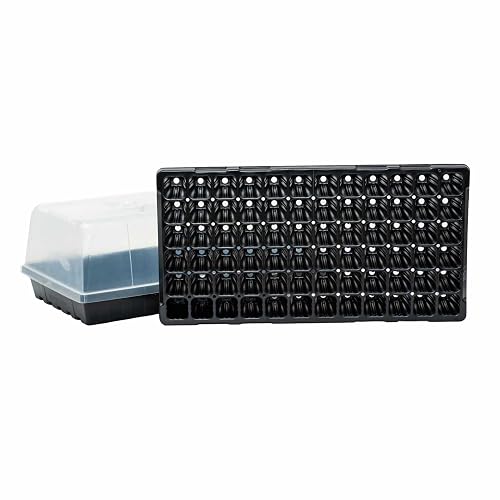
Cell trays give each seedling its own pocket of mix, so roots don't tangle and transplanting is easy. A humidity dome keeps the surface moist until seeds sprout; take it off once they're up. Soil blockers press free-standing cubes of mix with no plastic at all, and roots air-prune at the edges instead of circling. They're great, but they take practice.
Best starter
Gardzen
Seed Starter Trays with Vented Domes, 5 Pack
$19.79 as of Nov 5, 2026
★★★★★Our rating· In Stock
Five trays with cell inserts and vented humidity domes for about $20, enough to start a whole garden's worth of seeds. 8,900+ reviews.
Heavy-duty 72-cell inserts, 1020 trays and domes that last for many seasons instead of cracking. About $64 for two sets. The ones to buy once you're doing this every spring.
Presses eight 2 inch soil blocks at a time, so seedlings grow in free-standing cubes with no plastic cells. Roots stop at the air gap instead of circling, and transplanting causes almost no shock. About $28.
Seed-starting mix is finer and lighter than potting soil, drains well and holds just enough water. It's also sterile, which cuts the risk of damping off. Moisten it before filling cells, so it absorbs evenly. Seedlings don't need much fertilizer for the first couple of weeks; the seed carries its own food.
Best starter
Espoma
Organic Seed Starter Mix, 16 qt
$23.23 as of Nov 8, 2026
★★★★★Our rating· In Stock
A fine, organic peat-based mix with mycorrhizae for about $23 for 16 quarts, enough for many trays. Light and even, so seeds sprout well.
A cheap outlet timer runs your lights 14 to 16 hours a day so you never forget. A small fan blowing gently across the seedlings for a few hours a day makes their stems thicker and stronger, and the moving air helps prevent damping off. Both cost less than a pack of seeds.
Best starter
BN-LINK
U47 Mini 24-Hour Mechanical Outlet Timer, 2 Pack
$9.49 as of Nov 5, 2026
★★★★★Our rating· In Stock
Two simple plug-in timers for about $9. Push the pins for the hours you want, and the lights take care of themselves. 57,000+ reviews.
From a tray of damp mix to sturdy transplants takes about eight weeks. Here's what happens week by week, what to watch for, and the small adjustments that turn leggy sprouts into strong seedlings.
Seed starting is the gardening that happens in February, under lights, with a mug of coffee. It’s simple, but seedlings change fast, and most problems come from not adjusting as they grow. Here’s the rhythm of a first season for tomatoes and peppers, the two crops most people start with.
Week 0: Plan and sow
Find your area’s average last frost date and count back: about 8 to 10 weeks for peppers, 6 to 8 for tomatoes. Sow on that date, not earlier.
Then sow:
Moisten the mix first, until it holds together when you squeeze it but doesn’t drip.
Fill the cells and press lightly, then sow two seeds per cell at the depth on the packet. Most seeds go about two or three times as deep as they are wide.
Label everything. Every tomato seedling looks the same.
Cover with the humidity dome, set the tray on a heat mat at about 80°F, and wait. Lights aren’t needed until seeds sprout.
Tomatoes usually sprout in 5 to 10 days; peppers can take two weeks or more. The moment most of a tray is up:
Take off the dome so air can move.
Move the tray off the heat mat. Warm, humid air is perfect for damping off.
Turn on the lights, 2 to 4 inches above the seedlings, 14 to 16 hours a day on a timer.
If two seeds came up in one cell, snip the weaker one at the soil line with scissors. Pulling it disturbs the roots of the one you keep.
Weeks 3 and 4: Water, wind and true leaves
Water from below by pouring into the bottom tray and letting the mix soak it up for 20 minutes, then tip out the rest. Let the surface dry slightly between waterings. Constantly soggy mix invites fungus gnats and rot.
Set a small fan on low to blow across the seedlings for a few hours a day. The gentle movement makes stems thicker, just like wind outdoors.
When the first “true” leaves appear (the ones that look like the adult plant), start feeding with a liquid fertilizer at quarter to half strength once a week.
Tomatoes in small cells will soon run out of room. Move them into 3 or 4 inch pots with potting mix. Tomatoes can be buried deeper than they grew; the buried stem grows roots, making a sturdier plant. Peppers go in at the same depth.
Keep raising the lights so they stay a few inches above the tallest leaves.
Weeks 7 and 8: Harden off and plant out
About ten days before planting, start hardening off. Put seedlings outside in shade for an hour, then a little longer and a little sunnier each day, bringing them in at night. By the end, they can stay out overnight.
Plant out after your last frost date, once nights stay above about 50°F for tomatoes and peppers. Water them in well, and you’ve grown your garden from seed.
What not to worry about yet
Don’t start everything at once; stagger crops by their timing. Don’t fertilize tiny sprouts. And don’t panic over one lost tray. Seeds are cheap, and every gardener has knocked over a flat or forgotten a dome. Next week, sow again.
Save your money
What you don't need yet
Beginners get pressured to buy a lot of stuff that doesn't help them play
better. Here's what we'd skip on day one.
A greenhouse — A shelf with lights does the job indoors. Greenhouses are for growing on past spring.
A grow tent — Tents help hold heat and light for big setups. A few trays under strips don't need one.
Hydroponic systems — Fun, but a different hobby. Soil-based seed starting is easier to learn.
Expensive fertilizers — Seedlings need little feeding until they have true leaves, and then a diluted all-purpose feed is enough.
A light meter — Keep strips 2 to 4 inches above the leaves and watch the plants. Stretching means more light.
First week
Your first seven days
A short, real plan to get from gear-on-doorstep to actually playing.
Look up your average last frost date and count back to find start dates. · Learn
Moisten the mix until it holds together when squeezed, then fill the cells. · Action
Sow two seeds per cell at the depth on the packet, cover with the dome, and set the heat mat. · Action
Once most seeds sprout, remove the dome, move off the heat mat, and lower the lights to a few inches above. · Action
FAQ
Common questions
How far should grow lights be from seedlings?
LED strips usually work best about 2 to 4 inches above the leaves; more powerful panels hang higher, often 12 to 18 inches, per the maker's guide. Raise lights as plants grow. If seedlings stretch and lean, the light is too far away.
How many hours of light do seedlings need?
About 14 to 16 hours a day under grow lights. Use a timer. Seedlings also need some darkness, so don't run lights 24 hours.
Why are my seedlings tall and floppy?
Not enough light, usually from a window or lights hung too high. Lower the lights, give them 14 to 16 hours, and run a gentle fan to strengthen stems.
Do I need a heat mat to start seeds?
Not for everything. Lettuce, kale and many flowers sprout fine at room temperature. Peppers, tomatoes and eggplant sprout much faster and more evenly on a heat mat.
What is damping off?
A fungal disease that makes seedlings collapse at the soil line, often overnight. Prevent it with fresh seed-starting mix, clean trays, not overwatering, removing the dome after sprouting and running a fan.
What does hardening off mean?
Gradually getting indoor seedlings used to sun, wind and cooler nights before planting out. Over 7 to 10 days, put them outside for longer each day, starting in shade.
JustBeginning earns commission from affiliate programs. As an Amazon
Associate, we earn from qualifying purchases. This costs you nothing
extra and doesn't change our recommendations.
Prices and availability are accurate as of the date and time
shown and can change; the price on Amazon when you buy is what
applies.
How this works.

 Best starter